

Before your booking.
1. Complete the makerspace induction and formative manufacture training.
In order to use the low temperature caster, you must have completed the formative manufacture training.

2. Source your object for casting.
The object must fit within the casting tray. The casting tray has maximum dimensions 32 x 75 x 150mm.
If casting a 3D printed object, be aware that the layer lines visible on the 3D print will be visible on the pewter cast.
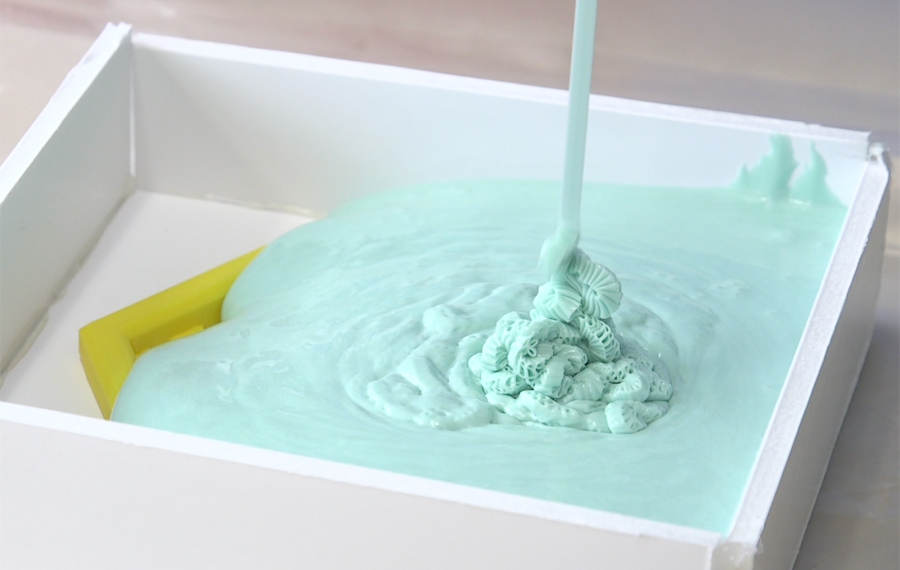
3. Make your silicone mould for casting into.
For more information on making silicone moulds, please see the Making Silicone Moulds knowledge base page.
The silicone mould making materials are kept in a locked cupboard, ask a member of staff for access.

4. Book the low temperature caster.
In order to use the low temperature caster, you must make a booking.
Loading and turning on the low temperature caster.
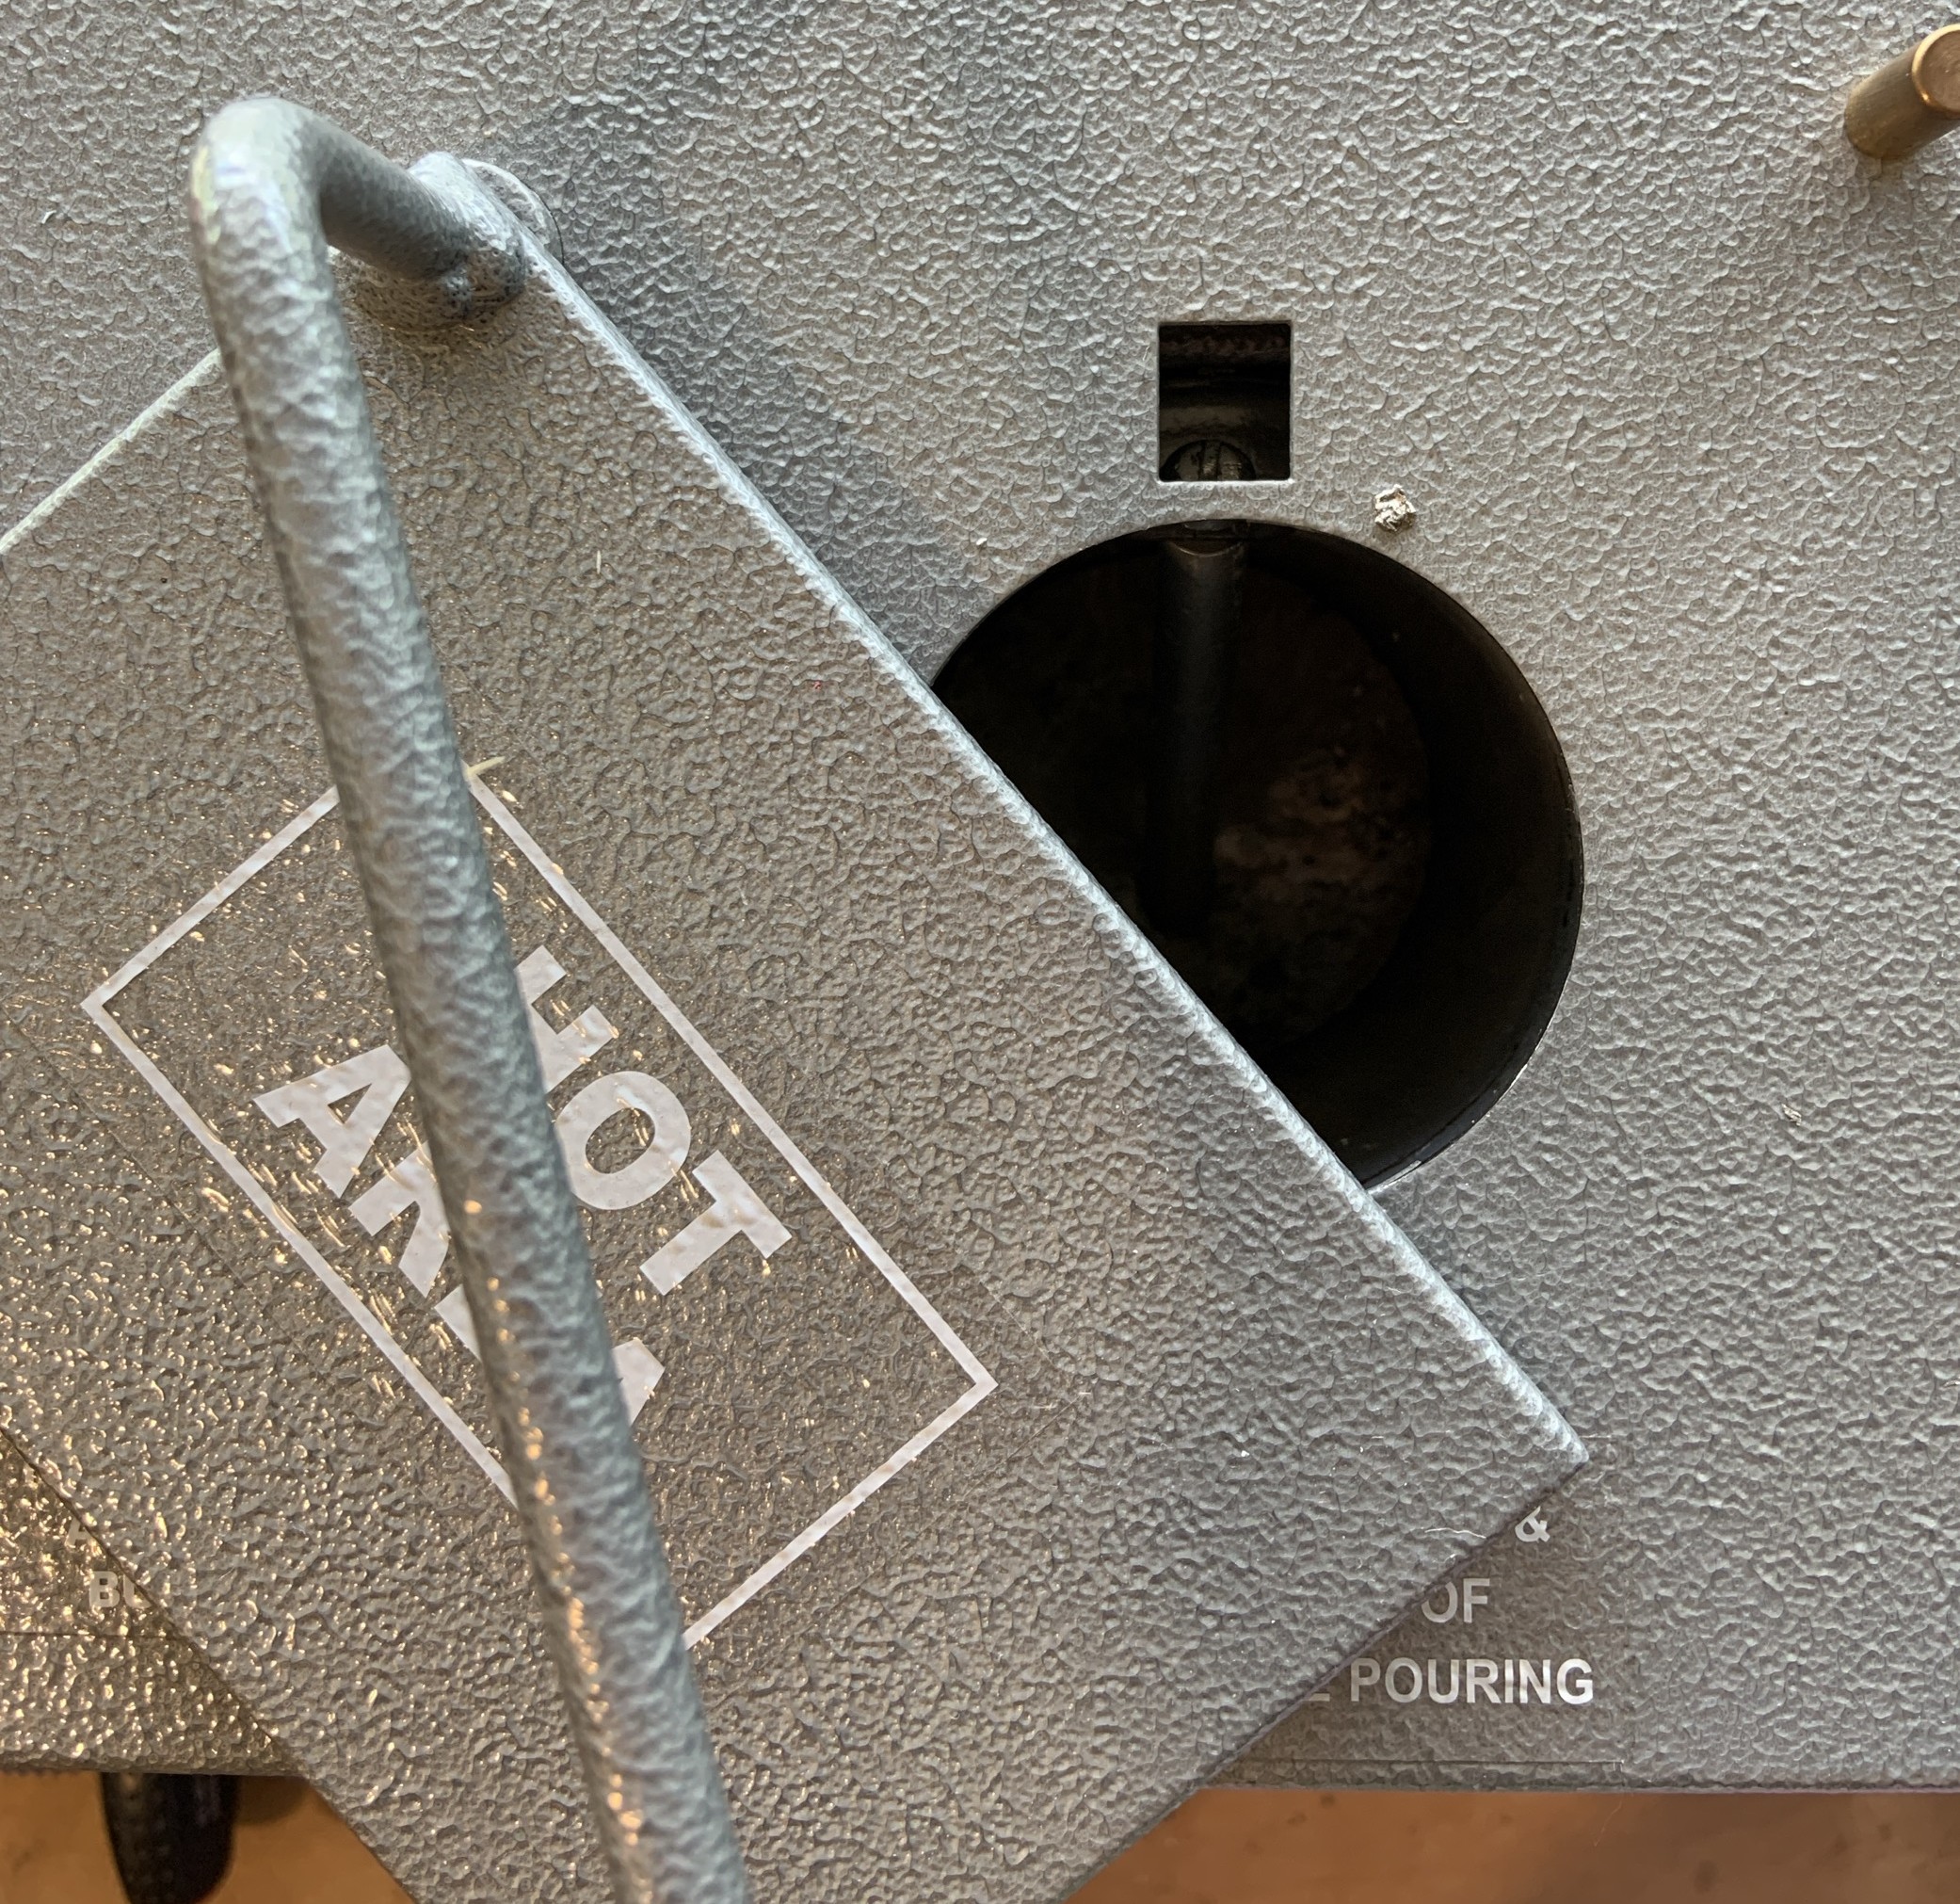
5. Check there is pewter in the caster.
Before turning on the caster, open up the crucible at the top of the machine and check the volume of pewter inside.
If needed, drop some more pewter into the crucible.
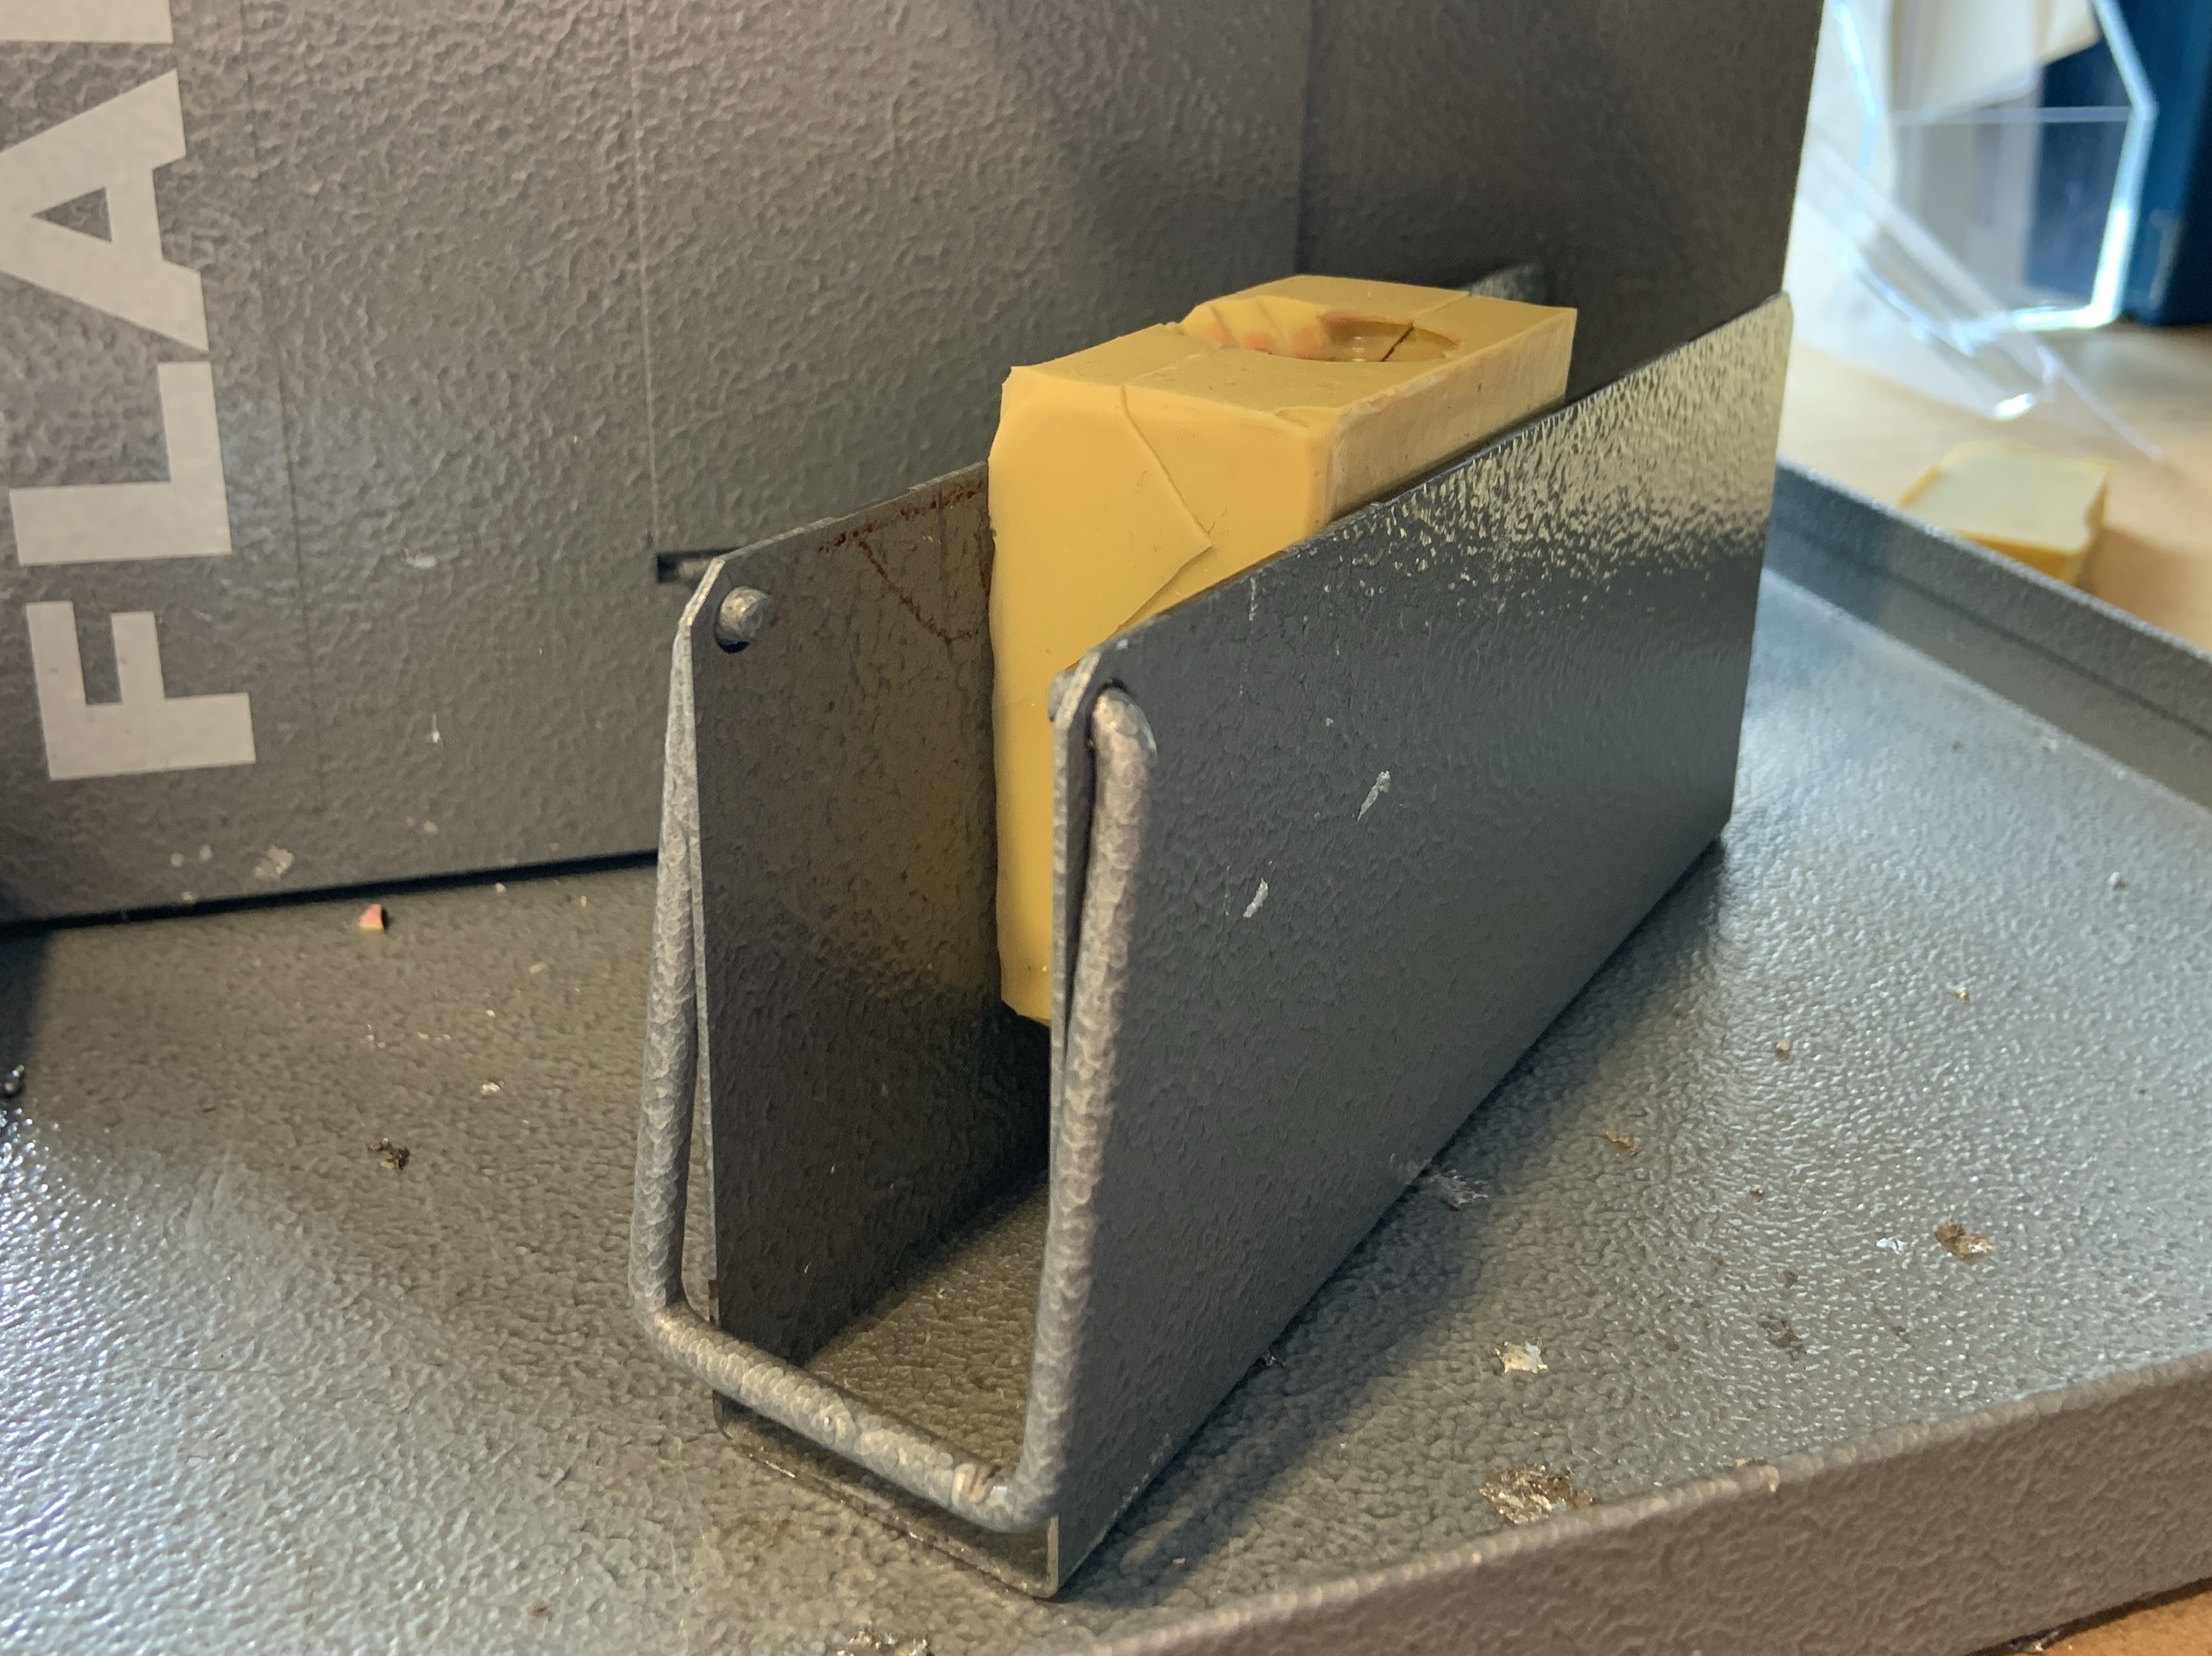
6. Secure the mould into the caster tray.
If you make a mould the fits snug, it will hold itself in place however smaller/thinner moulds will need to be held with shims.
Wood offcuts can be added util the mould is held securely.
Make sure the sprue is lined up with red tape as it tells you where the nozzle will be when the tray is loaded.
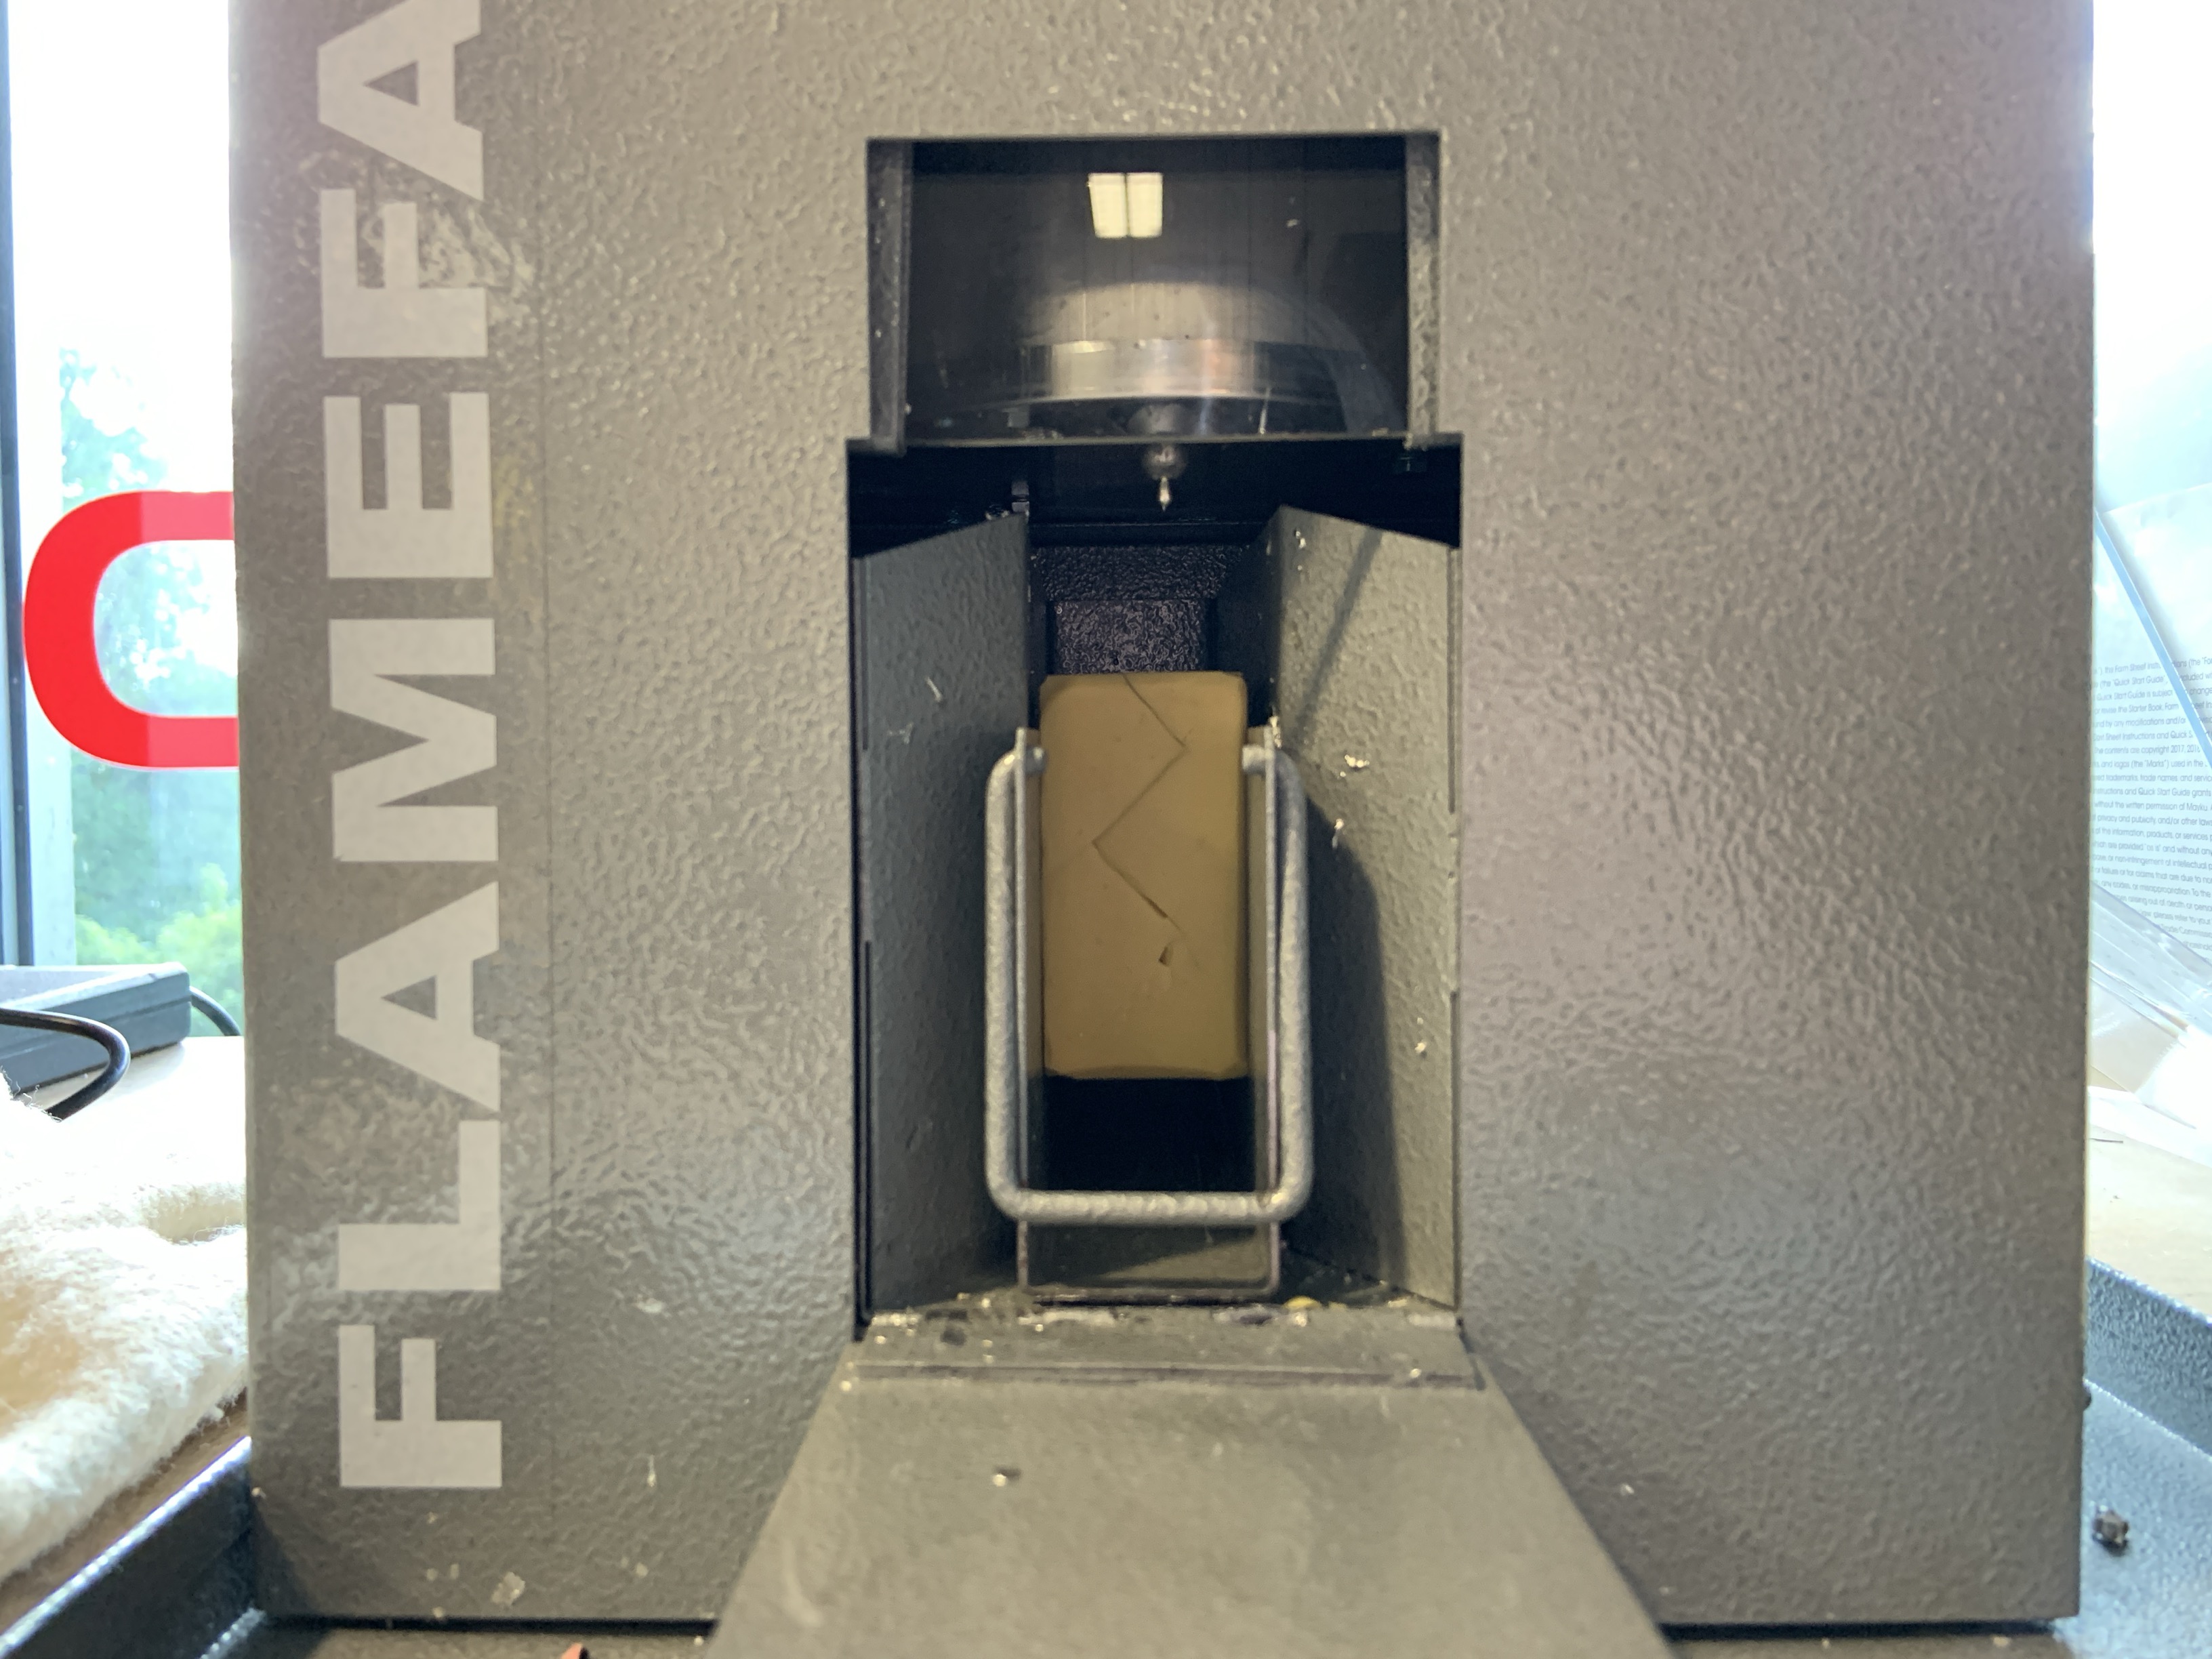
7. Load the tray into the caster.
Before turning on the caster, place the tray into the caster and close the door.
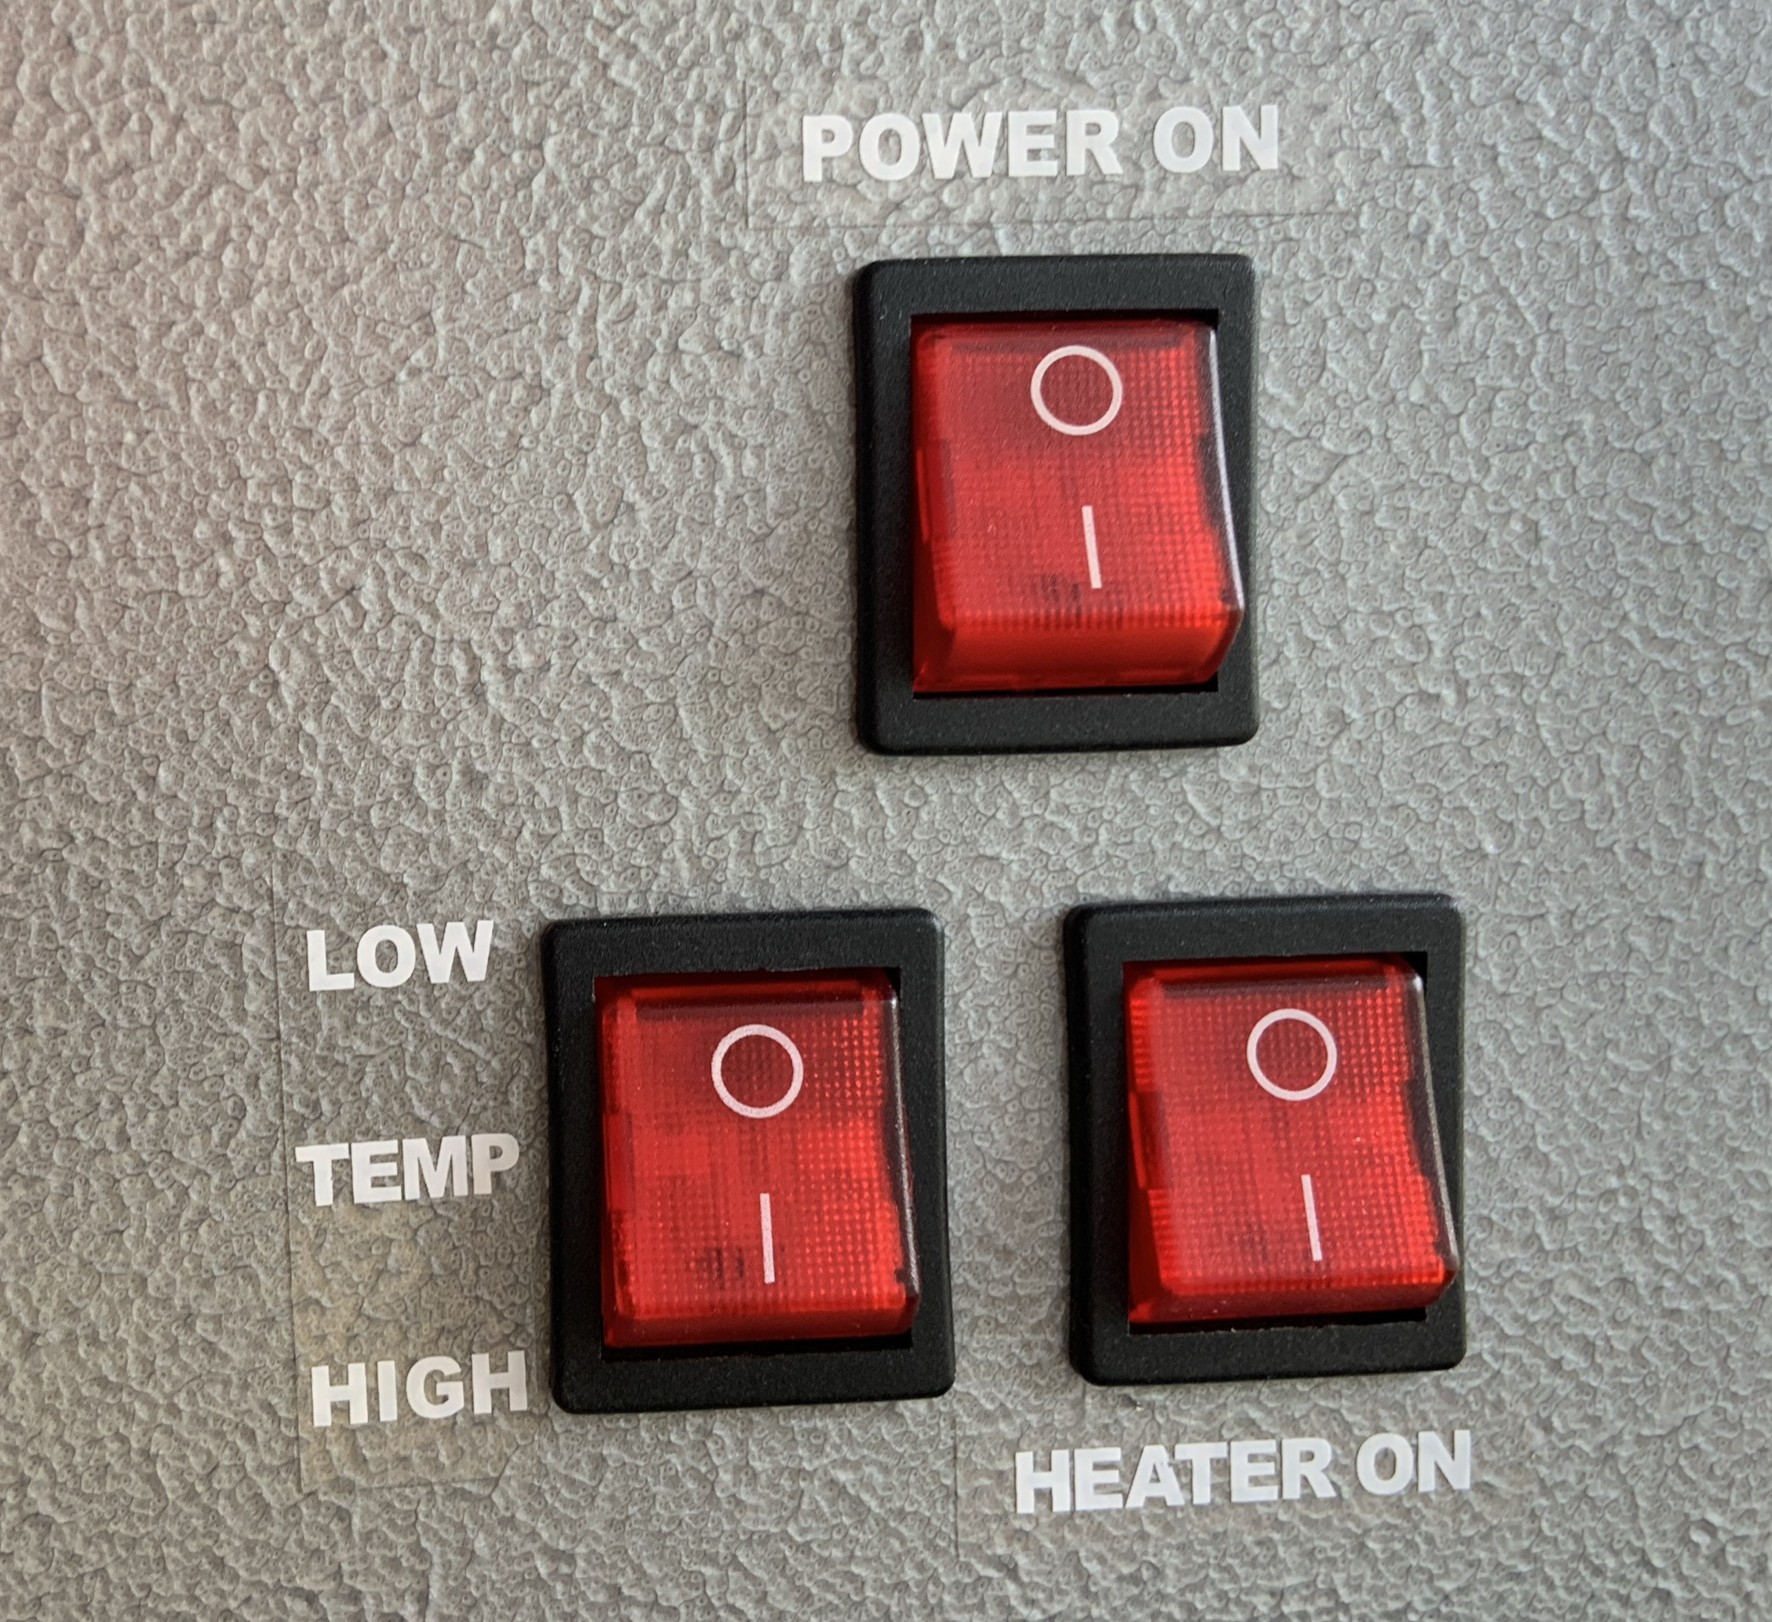
8. Turn on the caster and put on heat proof gloves.
The low temperature caster will need to be unlocked by a member of uCreate staff.
To turn the machine on there are 3 switches on the right side.
The top one activates the lights and fans only. The bottom right one will turn on the temperature and the bottom left switches between low (~150) and high(~250) temperatures. For pewter we use the high temperature setting.
Pouring the pewter.
Users must now be wearing heat proof gloves.
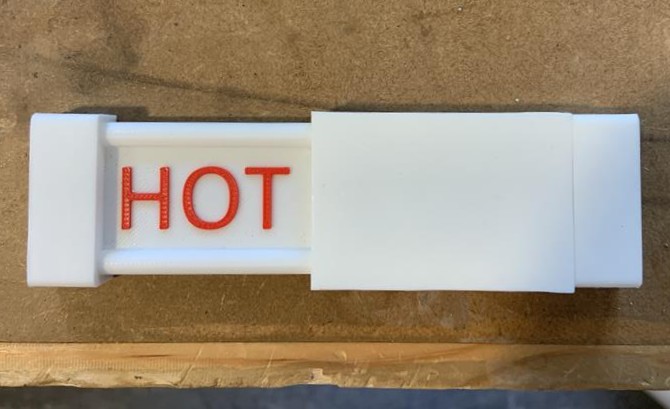
9. Move the caster sign to 'HOT' and wait for the pewter to become liquid.
While wearing heat proof gloves, routinely check the crucible to see if the pewter has become liquid.
While the pewter is heating up, as your mould is already in the caster, it will be heated up as well. A warm mould will lead to a better cast. Users can also heat up silicone moulds using the heat gun.
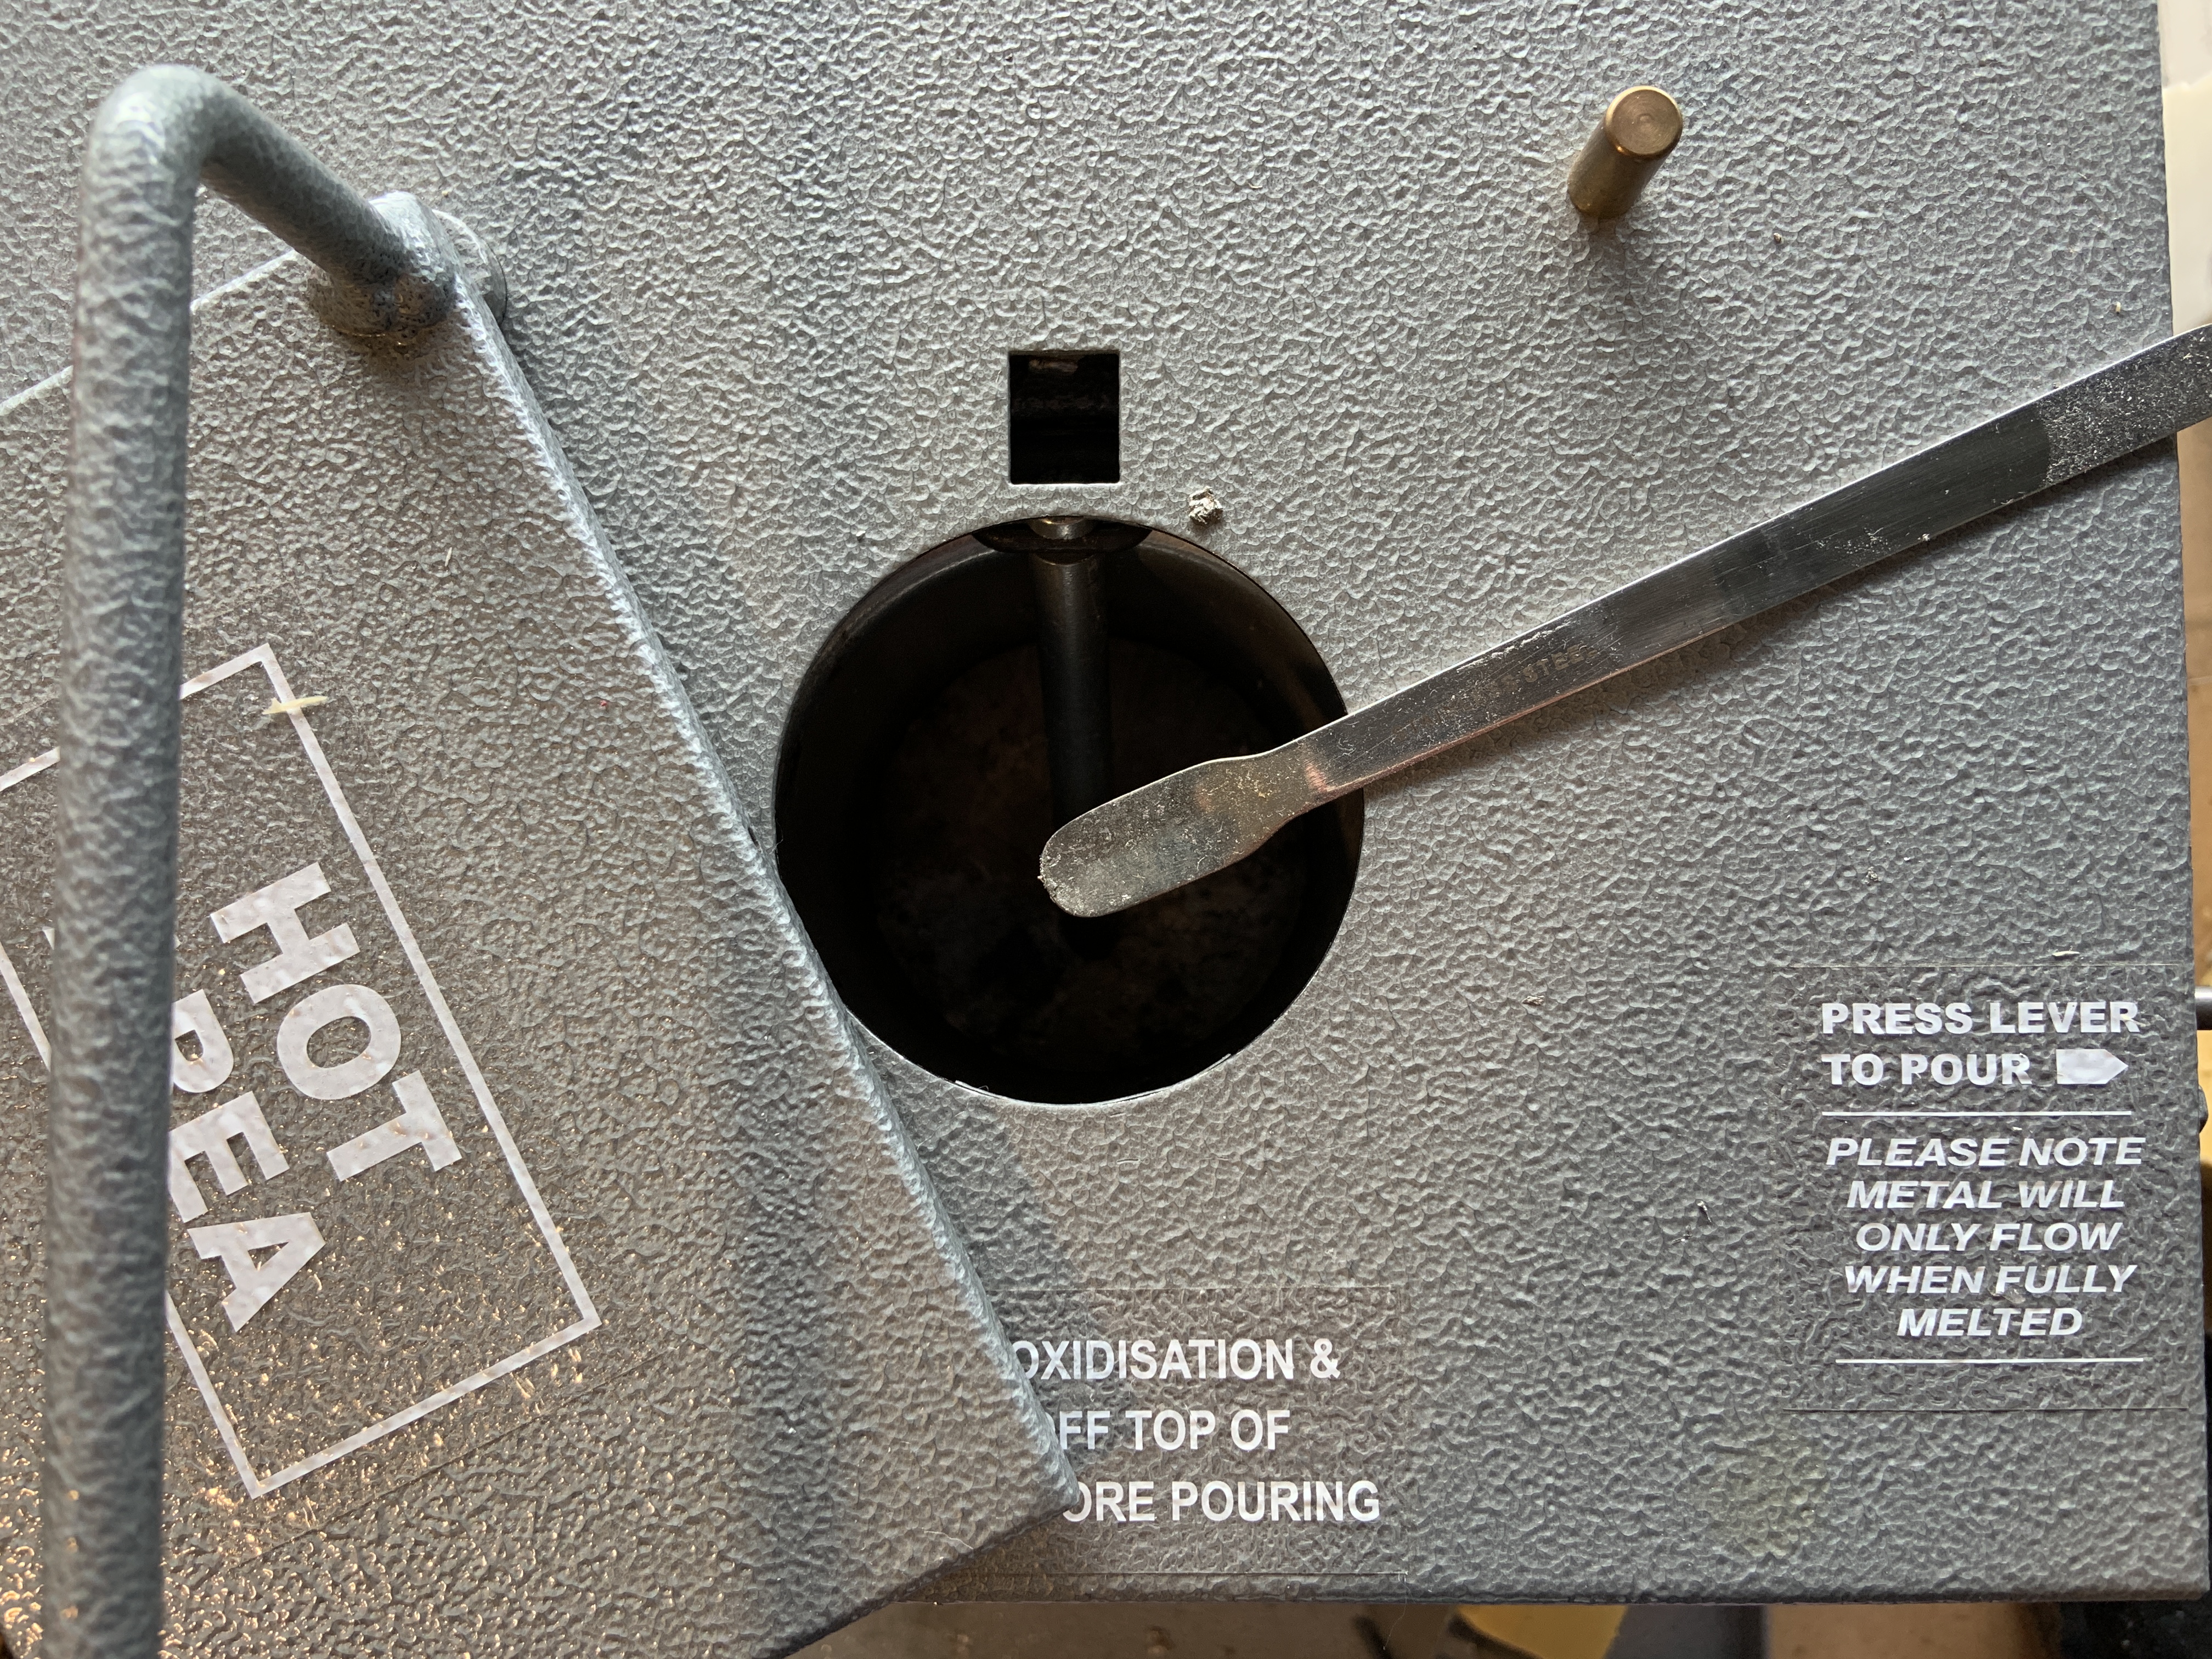
10. Scrape off any scum from the top of the melted pewter in the crucible.
While wearing heat proof gloves, use the scraper next to the caster to remove the scum from the top of the crucible. Put scum that has been removed into the caster tray.
If this step is avoided, the nozzle will get clogged and the machine will no longer work.
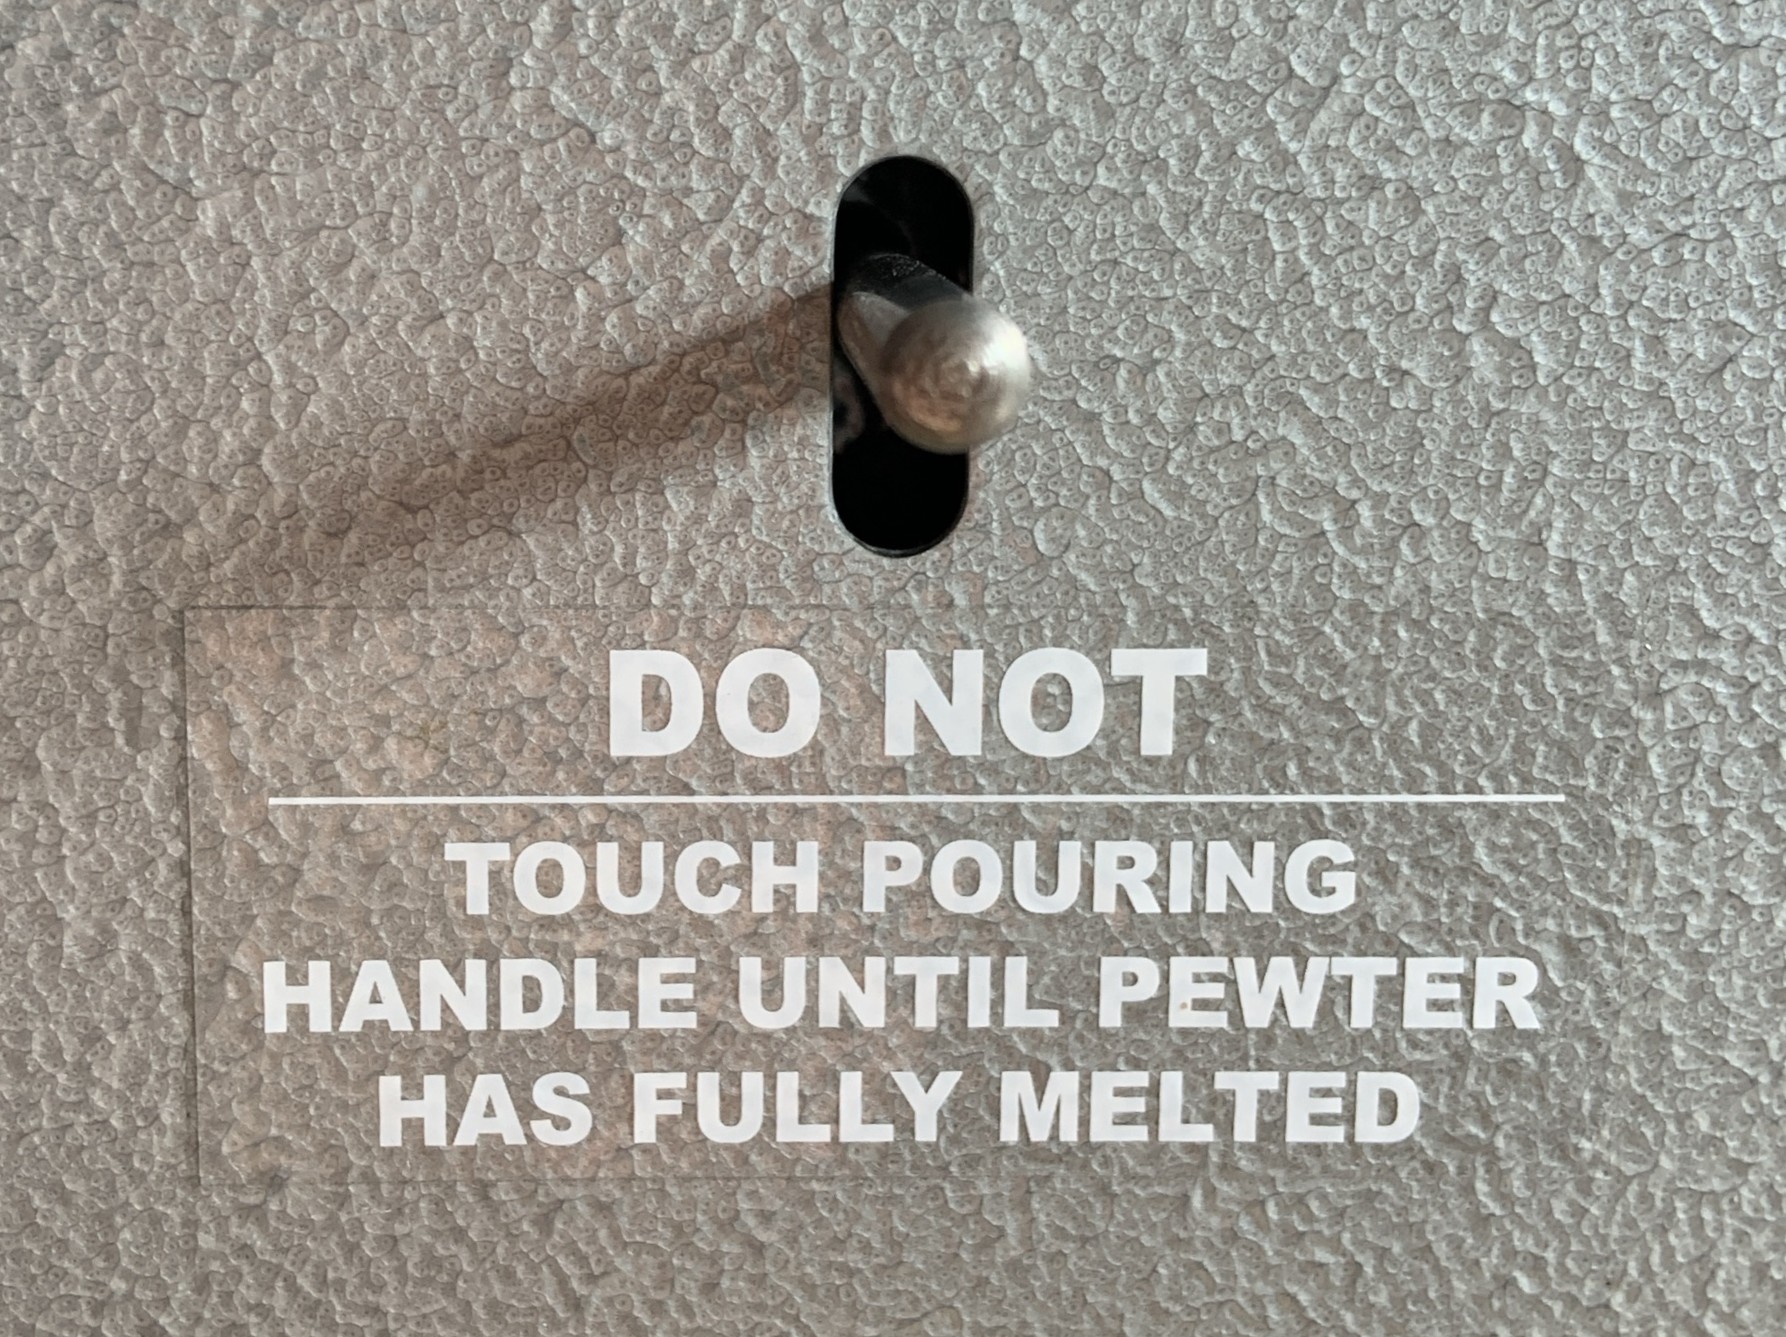
11. Press the lever down to pour the pewter into your silicone mould.
Watch through the window to make sure the pewter goes into the sprue and so you can see when to stop pouring.
After pouring.

12. Leave the mould to cool in the caster for 40 minutes.
Turn off the heater but leave the fans on as it will help the cooling process.

13. Remove the tray from the caster and take your silicone mould out of the tray.
Wear heat proof gloves when removing the tray and only take off when you are certain the mould is no longer hot.
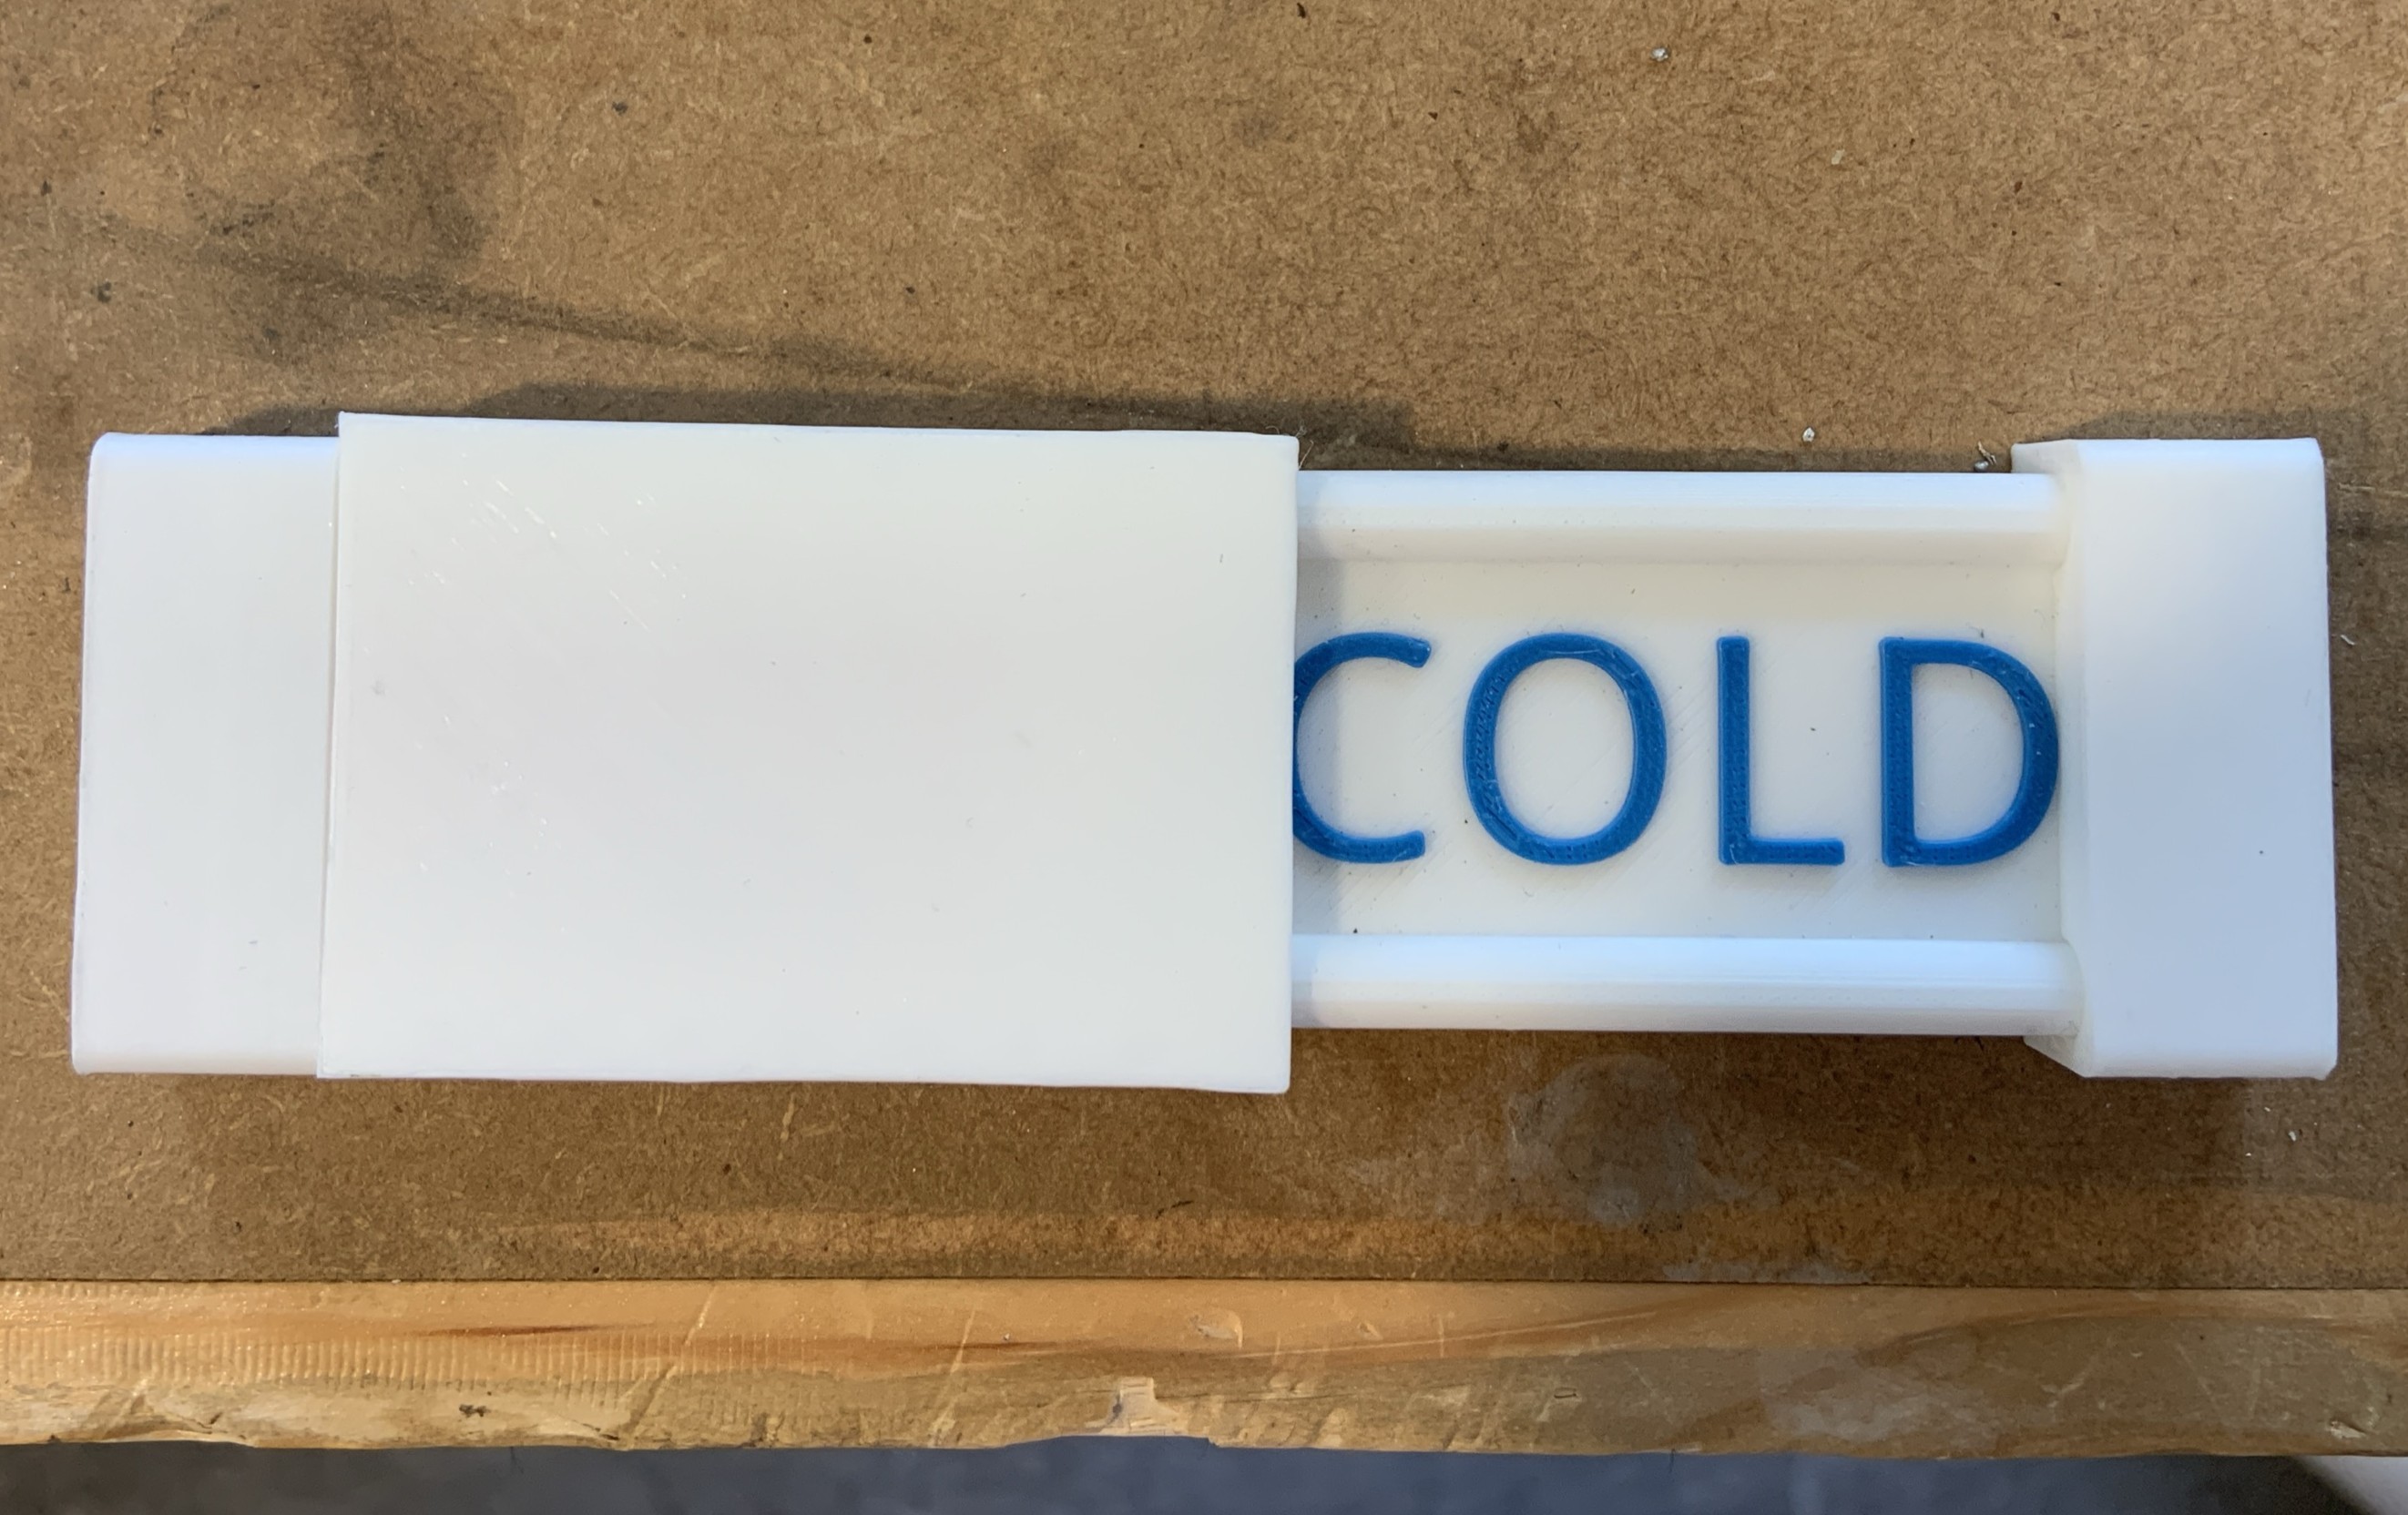
14. Inform a member of uCreate staff that you have finished with the caster and set the caster sign to 'COLD'.
Once you have finished with the caster, it will need to be locked up again by a member of uCreate staff.
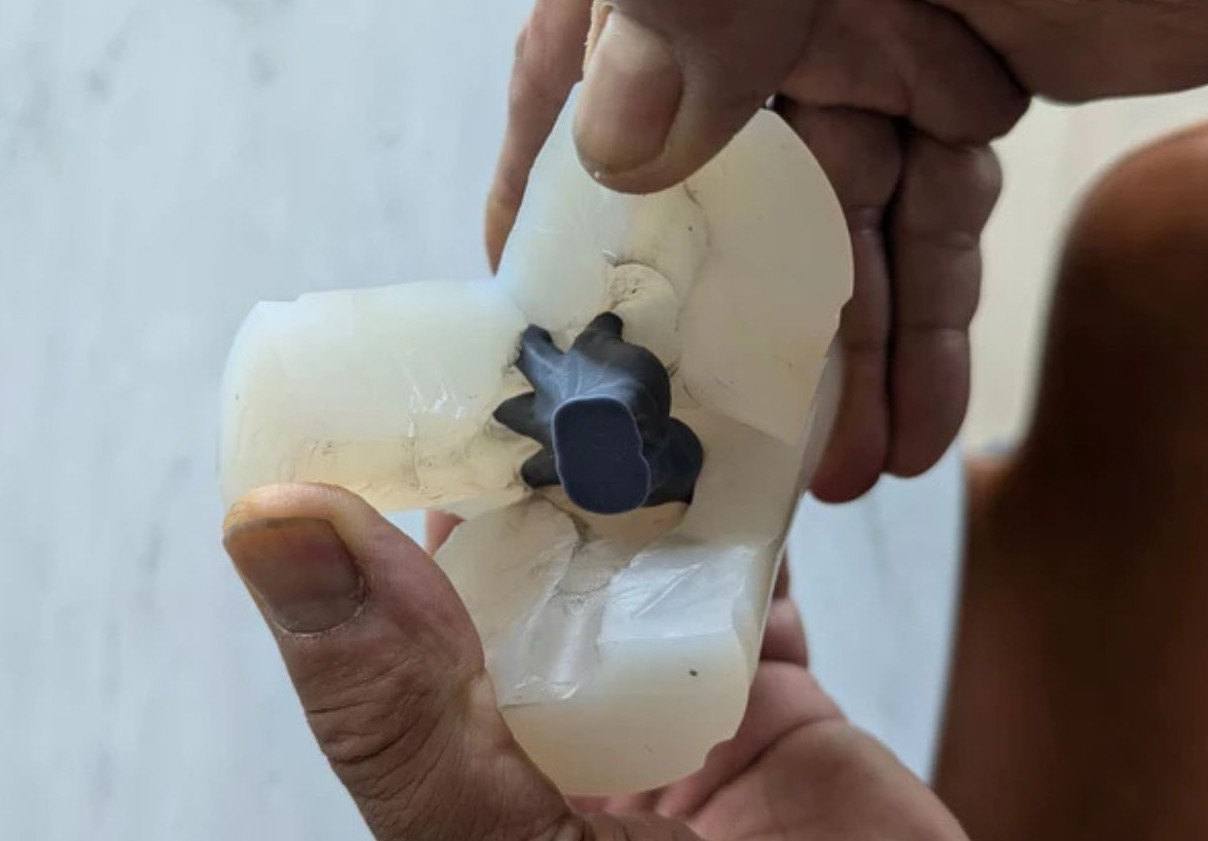
15. Remove your cast from the silicone mould and clean up your cast.
Once removed, the pewter object can be filed for a nicer finish.
Cutters can remove material but will send that material flying so be careful and aim into a safe direction like toward workbench.
Sprue and air vent marks can be cut off.