Glossary
Watertight: Watertight means the model is fully sealed and there is not even a tiny gap on the model (so sealed that water could not enter inside the model).
Process
1. Start Creating Mesh: Click the ‘Mesh Model’ button to start creating mesh.

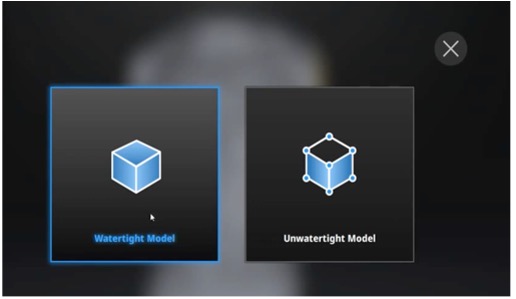
2. Select Mesh Type: In opening window you will see two options; watertight model and unwatertight model. If you would like the software to process the mesh according to the point cloud from the captured data, you can select unwatertight model. If you select watertight model, the software will create a watertight mesh by adding some information to created point cloud. This process will fill any gaps that might be present in the model.
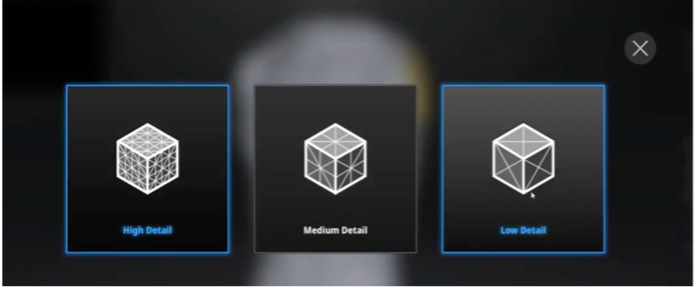
3. Select Detail Level: If you select watertight model, you will be able to select quality in opening window. According to final results you would like to get, you should select between high detail, medium detail, and low detail.
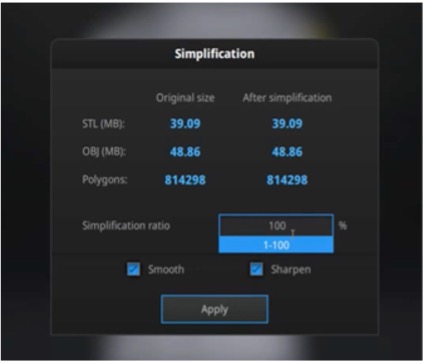
4. Make Mesh Operations (Optional): In the next window, you will be able to see the simplification, smooth and sharpen tools. Simplification is a process that decrease number of polygons that create model. In the simplification window, you can see how much your model will take space before and after simplification in stl and obj formats. Moreover, you can also see the number of polygons before and after simplification. You can also select smooth or sharpen the model.
5. Re-mesh Model (Optional): If you want, you can go back and re-mesh the model by clicking ‘Remesh Model’ button. By doing that, you will be able to reselect between watertight and unwatertight models and the detail you would like to get from watertight model.

6. Finish Mesh Model: When you are happy with mesh model, you can move on the saving process.
Video Training
See Also
Previous Step:
Next Step:
References
Einscan Pro 2x Plus Quick Guide
Training on Creating Mesh Model