
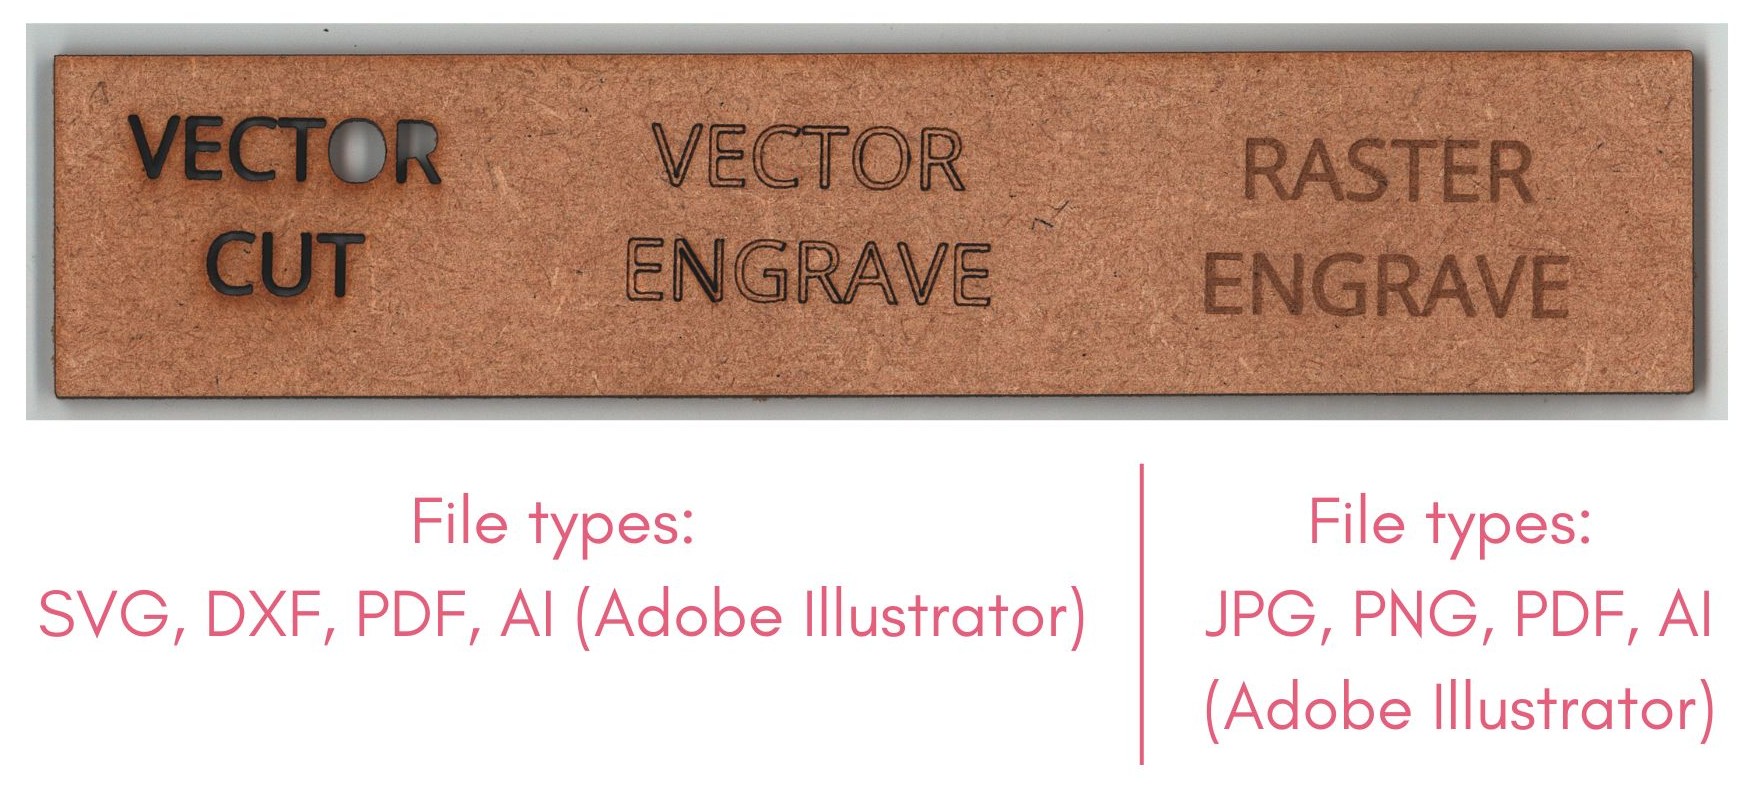
What is raster engraving?
Raster engraving is a means of translating a pixel based graphic onto the surface of a workpiece. Laser cutters do this by turning each horizontal row of pixels in an image into a string of laser pulses where each pulse corresponds to a pixel with its power determined by how dark that pixel is. Raster engraving is suited to large-area applications like filled letters and images and is the slowest form of laser cutting.
A simple way of thinking about raster engraving, is as colouring in.
Raster file types are: JPG, PNG, PDF, AI (Adobe Illustrator)
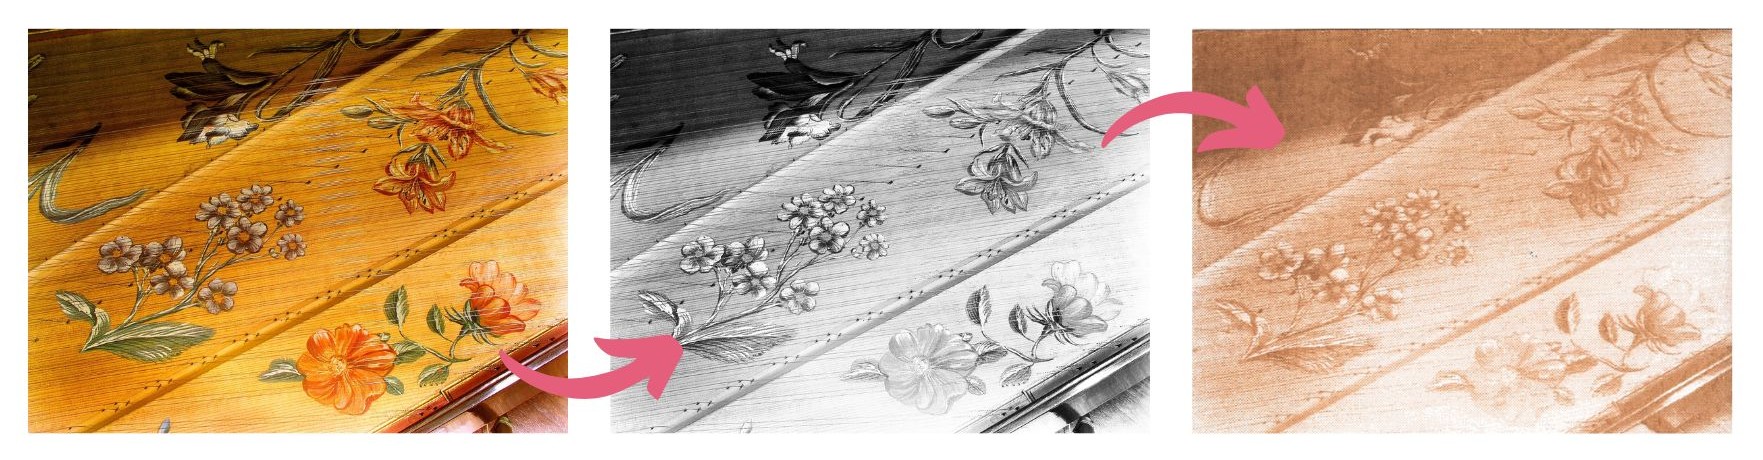
Most of the examples on this page, use the same reference image, showing how the different settings effect the same image. This image is Grand Pianoforte (Americus Backers) : PAINTING OR OTHER ILLUSTRATIVE DECORATION from the University of Edinburgh Collections.
What could I use raster engraving for?
- Engraving patterns, words or designs onto existing objects.
- Engraving a piece of material to create a custom sign or picture.
- Photo realistic engravings.
- Engraving stamps.

Image editing.
As mentioned above, raster engraving is a means of translating a pixel based graphic onto the surface of a workpiece. Laser cutters do this by turning each horizontal row of pixels in an image into a string of laser pulses where each pulse corresponds to a pixel with its power determined by how dark that pixel is.
It is likely your image will need editing before it is ready for laser cutting. In order to get the best results, increase the contrast and brightness of your image.
We also recommend turning it to greyscale to see a more accurate representation of what your final raster will look like.

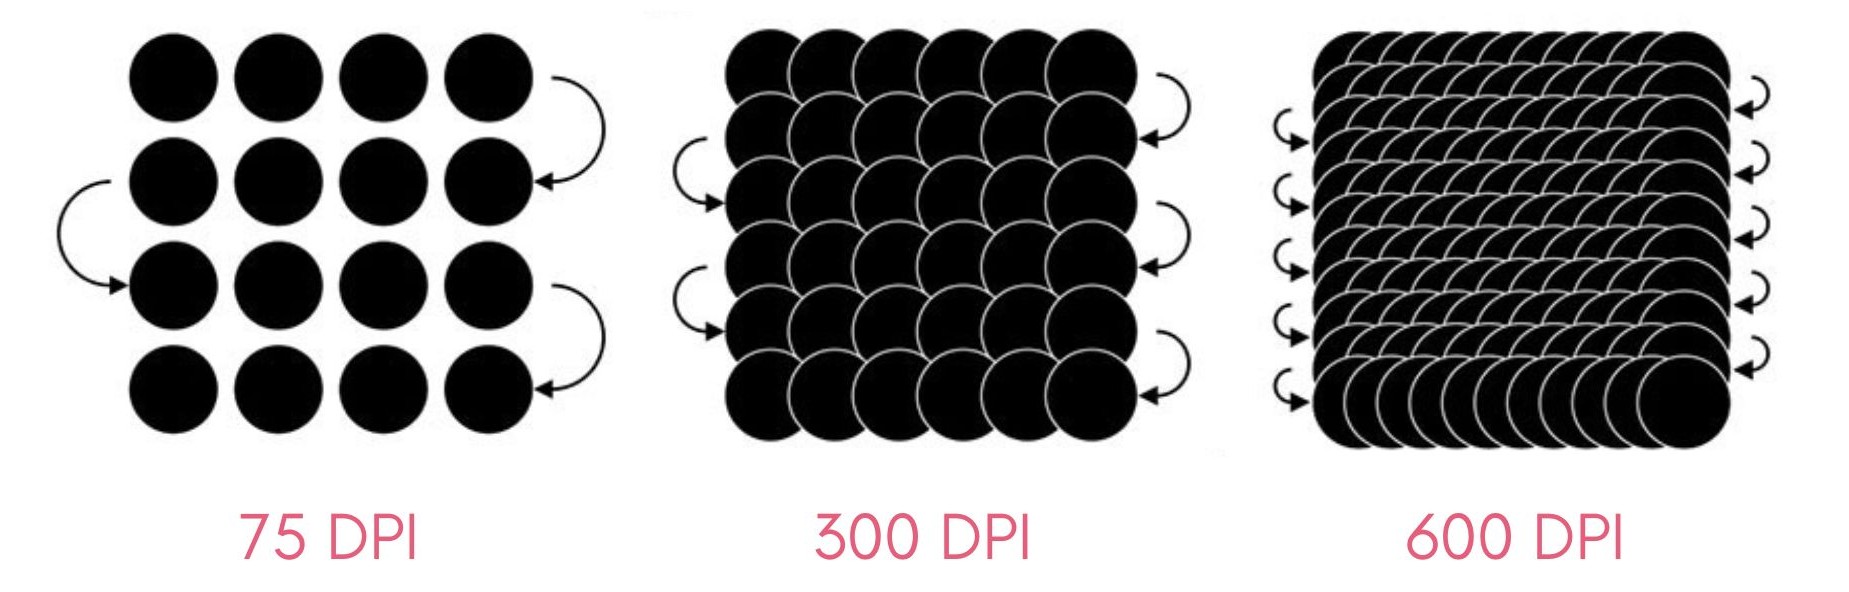
Resolution.
Resolution refers to the level of detail contained in an image. More specifically, to the number of pixels that exist within that image. The higher the resolution, the higher the pixel count, the more detail and definition you will see.
The unit for resolution is dpi, dots per inch.
All of uCreate's rastering profiles are set to and optimised for 500 DPI. We therefore recommend that you raster at a resolution of 500 DPI.
If you would like to raster at a higher resolution, please let a member of staff know as we may have to tweak the laser settings. Laser settings must never be changed by users, this must always be done by a member of uCreate staff.
The higher the dpi, the longer your raster engraving will take. A 500 DPI raster will take double the time as a 250 DPI.
For reference, all of the rasters on this page were done using the uCreate stock material profiles at 500 DPI.

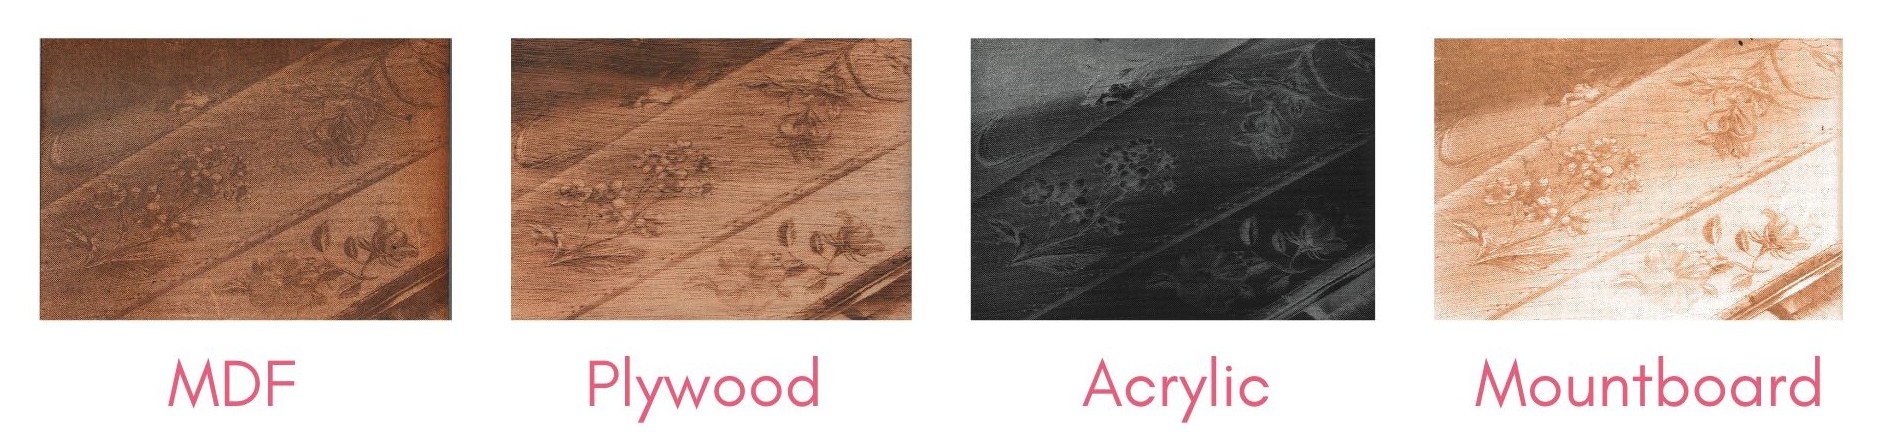
Engraving on different materials.
The same file, with the same settings, can look different on different materials. Below is the same image, on the 4 uCreate stock materials, MDF, plywood, clear acrylic and mountboard.
Please note that the clear acrylic has been backed with black vinyl.
Dithering styles.
Dithering defines how the dot patterns will be engraved for raster images. The Epilog Dashboard offers five different dithering patterns to enhance your engraving projects. The default mode is Standard. This mode can be used for all images including photographs.
The differences between the dithering styles is very small, and therefore, in general, we recommend leaving the dithering style as standard.
If you would like to experiment with other dithering styles, the application for each style is listed below.
Standard: This is the default mode and will be used for most engraving jobs that include text and clipart at 600 DPI.
Floyd-Steinberg: Produces an almost wave-like pattern to an image. This works well for some photos containing a great deal of detail. Photos with more monotone swatches of colour may not be as pleasing as Jarvis or Stucki modes.
Jarvis: Many users find this mode good for engraving photographs at 300 DPI. This mode produces a very nice looking pattern on almost all photos.
Stucki: This mode produces results that are only marginally different than the Jarvis dithering pattern. It is also very good for engraving photographs at 300 DPI. The differences between Jarvis and Stucki are very subtle.
Bayer: This mode is an efficient and widely used halftoning technique. It is easily distinguished by its noticeable crosshatch patterns. Bayer (ordered) dithering is more suitable for line-art graphics.
