What is OBS?
Open Broadcast Software (OBS) is a software for recording and live streaming video content. It allows users to create "scenes" by combining multiple video and audio sources like cameras, screen captures, and microphones.
We recommend using OBS for your audio recording if you are using one microphone only. If you are using two or more microphones, please see the Using Adobe Audition in the Digital Transformation Suite knowledge base page.
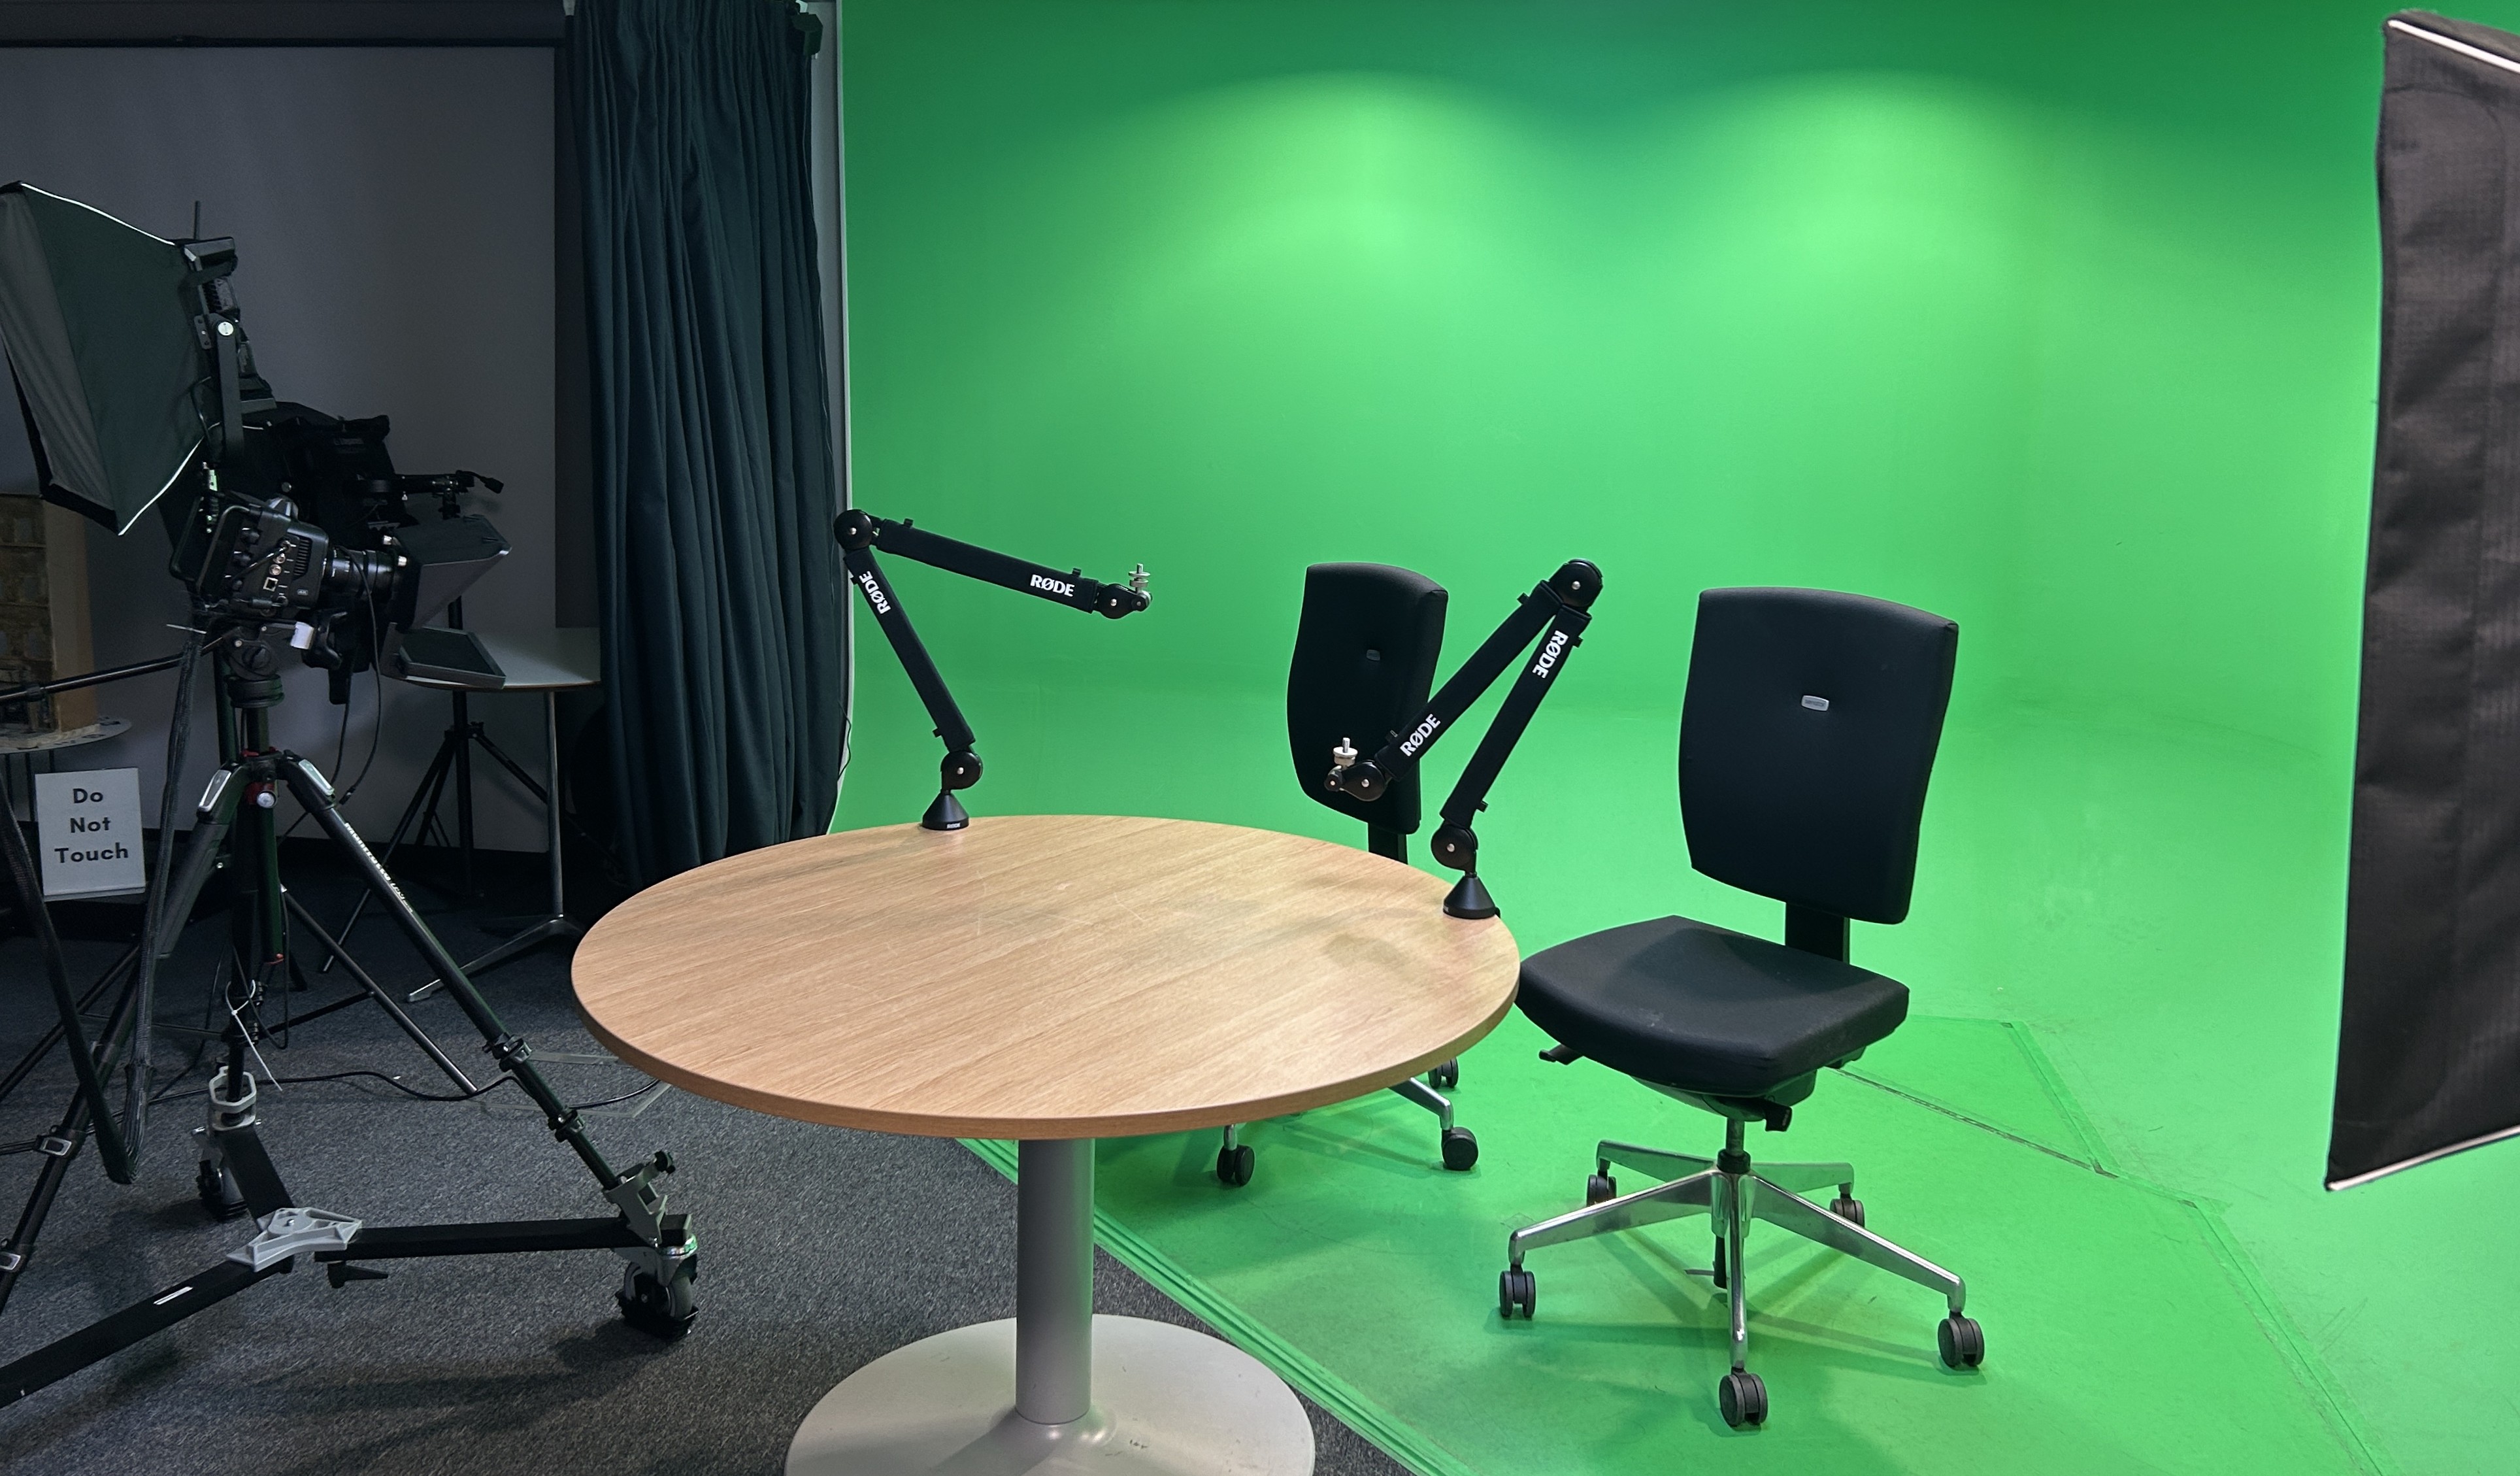
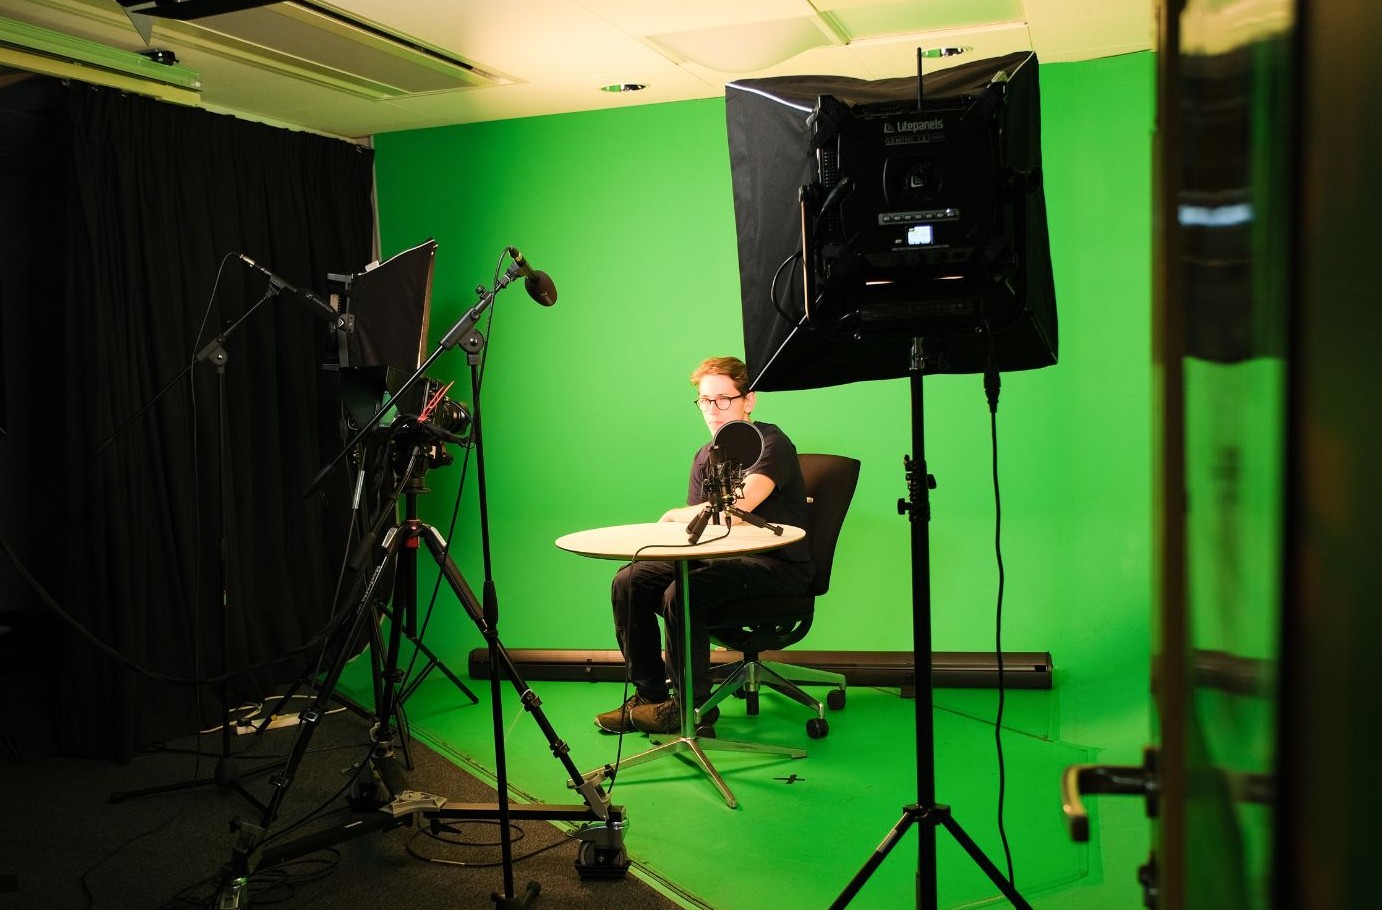
OBS is downloaded on the green screen computer in the Digital Transformation Suite and we recommend using this when filming on the green screen.
OBS is a free, open-source software so users are also able to download it on their own computer for use outside of uCreate as well.

OBS Workflow.
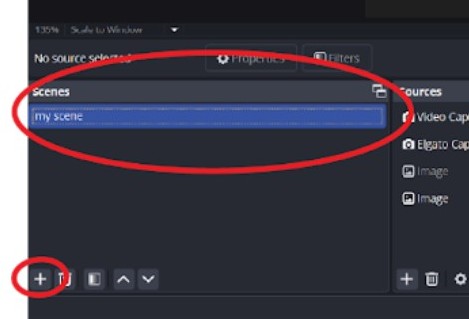
1. Open OBS, add and name your scene.
Click the + button in the scenes dialog in the lower left corner of the screen.

2. In the sources dialog, select the “Elgato - Black Magic 4K” as your video capture device.
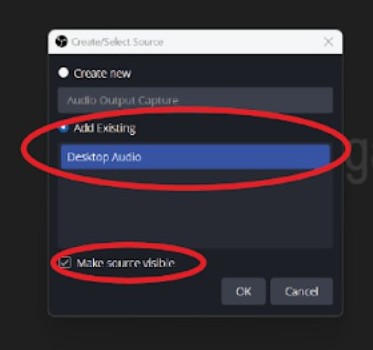
If the “Elgato - Black Magic 4K” is not an option, click the + button and in the pop up window, select "Add Existing" and then “Elgato - Black Magic 4K”.
Make sure the “Make Source Visible” tick box is selected.
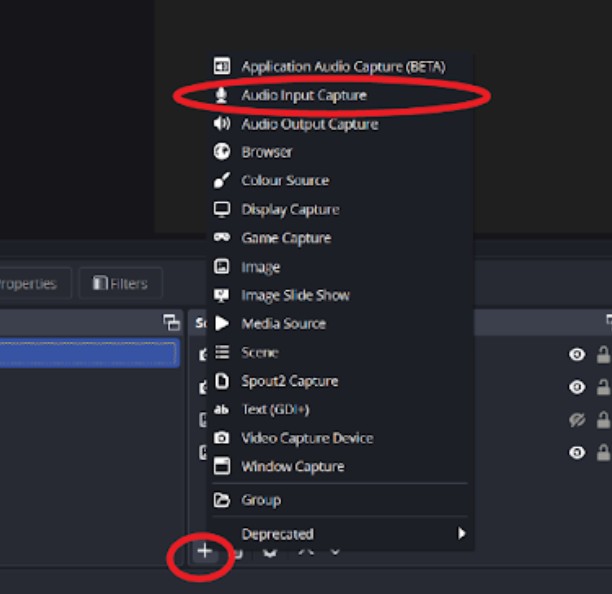
3. Repeat for your "Audio Input Source". Once Audio Input Capture shows up on the list of sources, double click the source to open the Properties dialogue box.
In the dropdown menu for “Device,” make sure “Analogue 1 + 2 (Focusrite USB Audio)” is selected.
Make sure the audio bars next to “Mic/Aux” in the Audio Mixer module (lower middle right) are recognising the audio feed (audio bars start bouncing).
Click the Audio icon to turn it from off (red X next to red volume emoji) to on (x disappears, volume emoji turns white).
4. Repeat for your "Audio Output Source". Select “Desktop Audio” and once "Audio Output Capture" shows up on the list of sources, double click the source to open the Properties dialogue box.
In the dropdown menu for “Device,” make sure “Default” is selected.

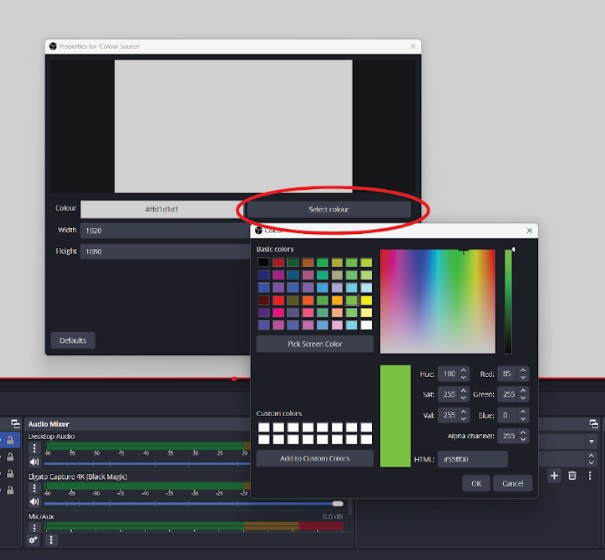
5. Select "Colour Source", create a new source and rename it. This will be the coloured background to replace the green screen.
Pick a white colour for a standard background, but you can also adjust to your preference.
You can always change the tone of your colour source later by selecting Colour Source in the sources panel and going to Select Colour.
Make sure in the line up of sources, Colour Source is listed below the "Elgato Black Magic 4K", otherwise the colour will overlap on top of the green screen image.
You can add multiple Colour Sources if you plan on switching colours during your recording.

6. If you are using multiple microphones or cameras, add additional recording devices using the + icon in the Sources dialog box.
Source order can be adjusted via clicking and dragging your specified source to your desired order (i.e. Colour Source to the bottom of the list, etc).
Sources can be toggled on and off by clicking the eye emoticon to the right of the source.
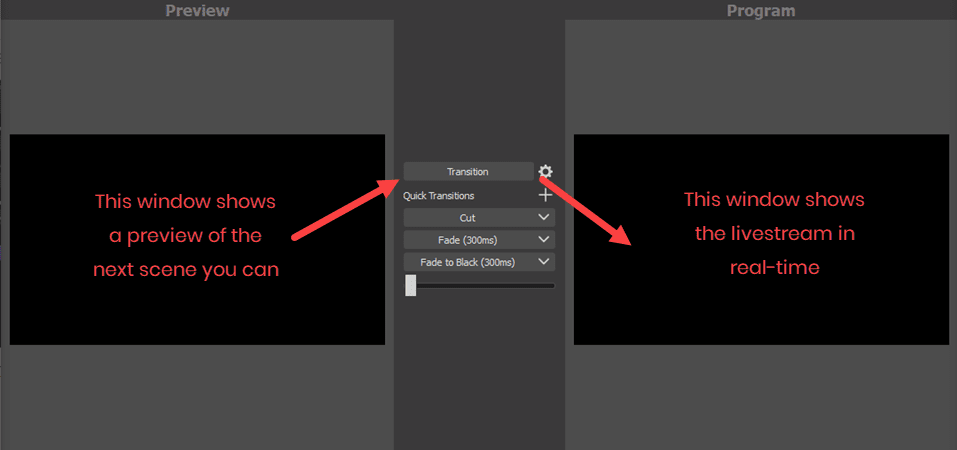
7. The video source on-screen size can be adjusted in the Preview dialog (upper left side of the screen).
When you select your video source a red outline should appear. Adjust the video size by clicking and dragging the edges.
If returning the image to its original size, the edges should “snap” to the corners of the output screen as you click and drag the image size.
Click “Transition” in the centre to transfer the Preview image to the “Program” module.
What appears in the Program image module will be what will output when you record. If a desired adjustment is not appearing in your recordings, try clicking “Transition” to ensure all Preview changes have been moved to Program changes.
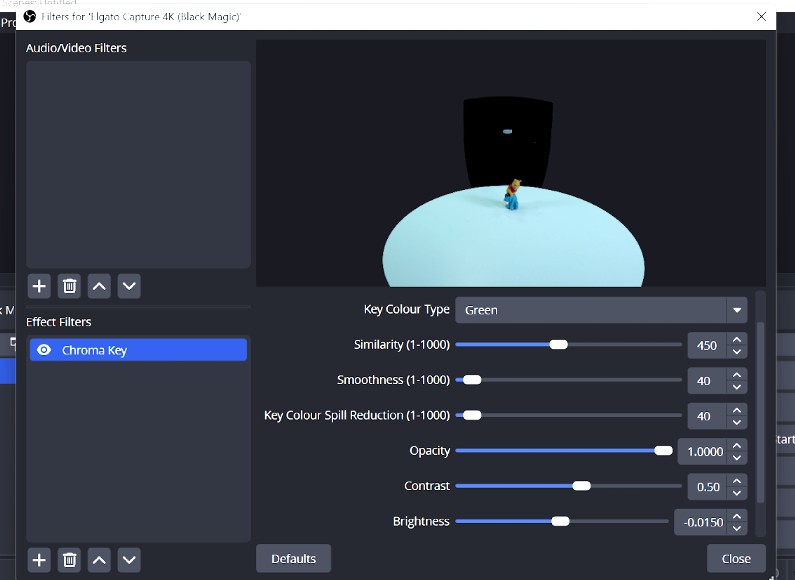
8. Click "Filters" in the Window Capture bar above Scenes (lower left dialog), “Chroma Key” and adjust the settings to desired levels to adjust the green screen background opacity.
Recommended starting settings:
Key Colour Type: Green
Similarity: ~450
Smoothness: ~40
Key Colour Spill Reduction: ~40
Opacity: 1.0000
Contrast: 0.50
Brightness: -0.0150
Gamma: 0.00
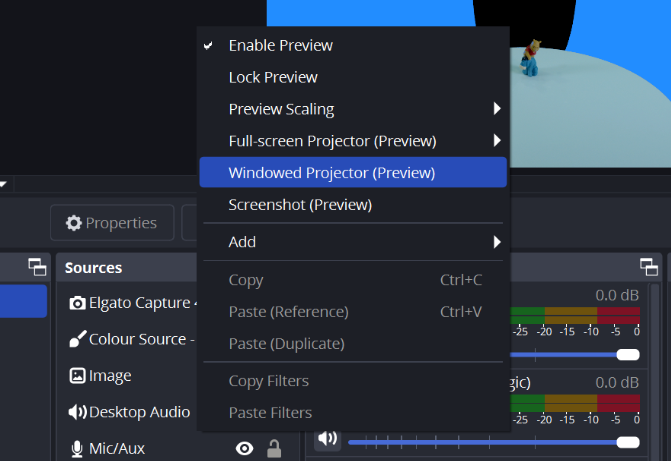
9. Right click on the Program Dialog and select “Windowed Projector (Program)” to utilise both of the computer monitors to make your recording process smooth. Click and drag the pop up window to the top monitor and select the Full Screen moticon in the top right corner to fill the screen.

10. Set your sound levels. The human voice should be recording at an average of 6dB.
Sound levels record in Decibels (dB).
Adjust via the gain on the mixer, more information available on the Setting up Audio in the Digital Transformation Suite knowledge base page.
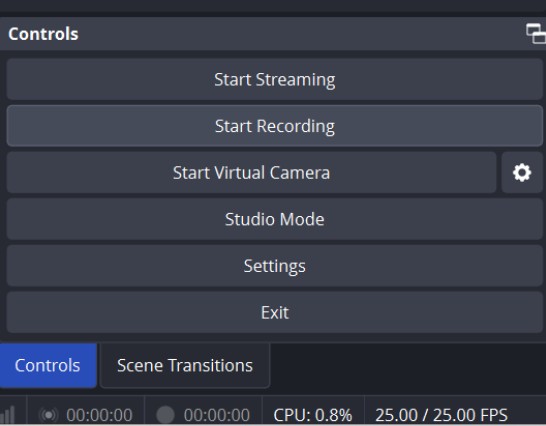
11. Click "Start Recording".
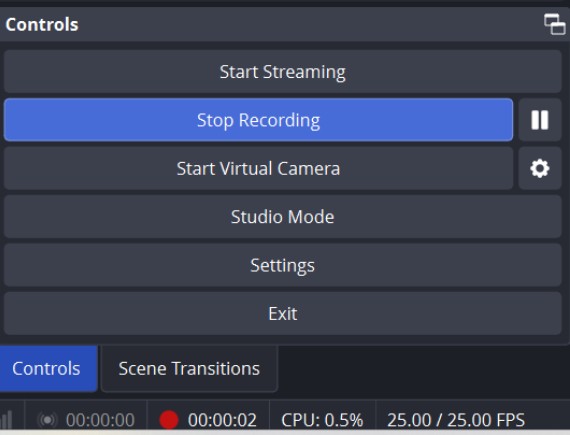
11. Click “Stop Recording”.
Your files will automatically export to designated spots.

12. Find your file in Windows Files → Desktop → Transient Files → OBS Captures. It should be the last file listed. Open the file and view/listen to its contents.
Repeat the recording process for as many takes and shots as necessary.
It is good practice to not delete any of the recorded files.
13. Copy and paste your files onto an external hard drive for personal editing use.
Your files will be deleted during our routine computer clean up.
Converting OBS files for editing.
To edit your OBS files in our editing software, you may need to convert the original codec (.mkv) into an editable codec (.mp4 OR .mov recommended).
OBS records in .mkv to capture the most amount of original data possible.
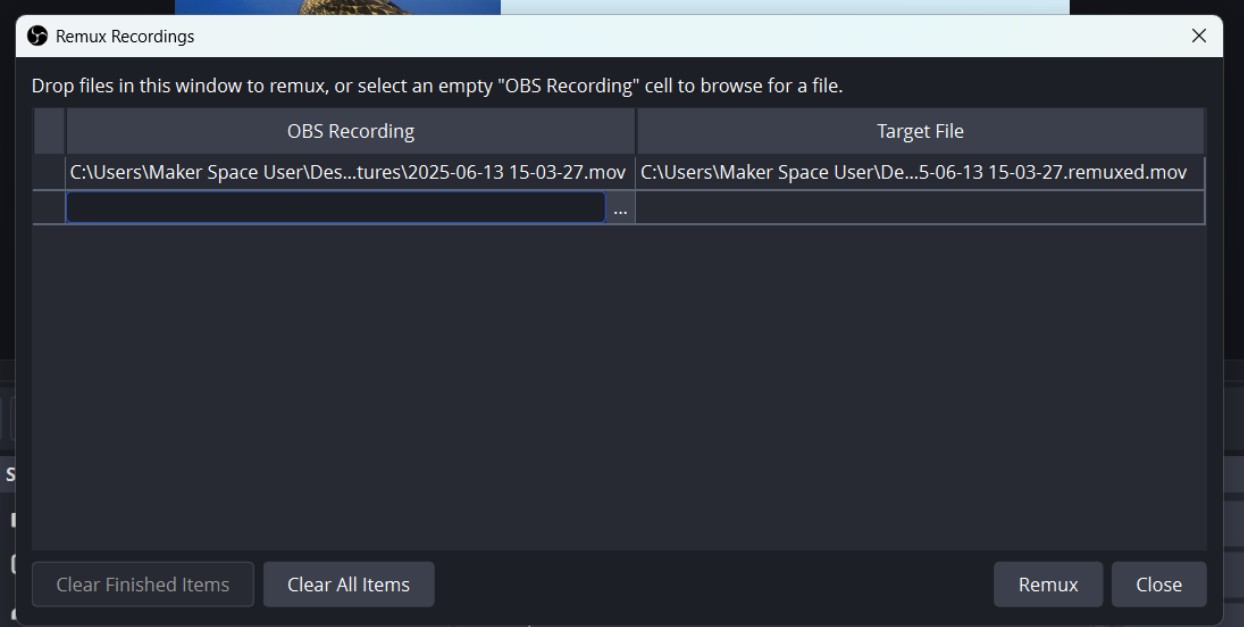
1. Go to File → Remux Recordings, which will open a dialogue box with two columns: “OBS Recording” and “Target File”. Find your file in Windows Files.
2. Click and drag your file into the OBS Recording area of the Remux dialogue box. Click “Remux.”
The Target File should populate with the same file name in the same file location, but with a .mp4 or .mov at the end.
A green process bar should appear in the base of the Remux dialogue box. If remuxing multiple files, green check marks will appear to the left of the file name when each remux is complete.
3. Once complete, click “Clear Finished Items” and close the dialogue box.
Your .mp4/.mov items should now appear in the same file folder with the original .mkv files. These .mp4/.mov files are compatible with our editing software.
DO NOT delete the original .mkv files. Aside from being good practice, saving all original files gives you backups should the .mp4 files get corrupted for any reason.
4. Transfer your created .mkv and .mp4/.mov files to an external hard drive for your use.
Your files will be deleted during our routine computer clean up.
Top tips for using OBS.
Always test record before filming.
It is good practice to take a test recording before starting your main project. This allows you to save time by identifying any errors in the set up as soon as possible.
You can adjust backgrounds while you are filming in OBS.
This is found in the Transitions tab next to the Controls tab (bottom right).
To change the image/colour/video background, make the adjustment in the Sources module (bottom centre). Toggle on the desired secondary colour, image, or video. It should appear in the Preview module, but will not show up in the recording.
Click “Transition” to bring the colour/image to the Program module. This will now show up in recording.
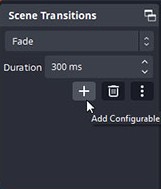
You can add in transitions while you are filming in OBS.
To add a transition, click the + button next to “Quick Transitions” in the Transitions area.
It should show you three options: “Fade to Black,” “Cut,” and “Fade.” The automatic time length for these transitions is 300ms (milliseconds), but feel free to adjust to your preferred time length.
Once clicked, the transition should appear in a list. To use, simply click the transition at the preferred time during recording. You should see your image adjust with the in-recording transition.
Transitions can make post-production tricky, so use wisely!
How can I access and learn more about use of the Digital Transformation Suite?
In order to use the Digital Transformation Suite, you need to have been inducted into the makerspace.
Once you have completed your induction, you are able to book to use the Digital Transformation Suite using our booking system SISO.
We also offer training sessions which go through use of the green screen and accompanying equipment in the Digital Transformation Suite. It is not compulsory to attend the training to use the green screen but it is strongly advised.
Training sessions are bookable via our events calendar.